5. How to Add a Layer with an Image
In order to create a layer with an image, we will add a new layer, open the other image file, copy part of the image and paste it to the new layer.
First, we need to add a new layer by clicking the “Add New Layer” button in the Layers section. The default name of the new layer is “Layer 2”.
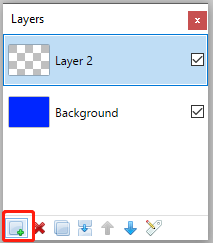
Let’s double click the new layer “Layer 2” to open Layer Properties dialog, where we change the layer name to “Logo” and click “OK”. Now we have a new blank layer “Logo”.

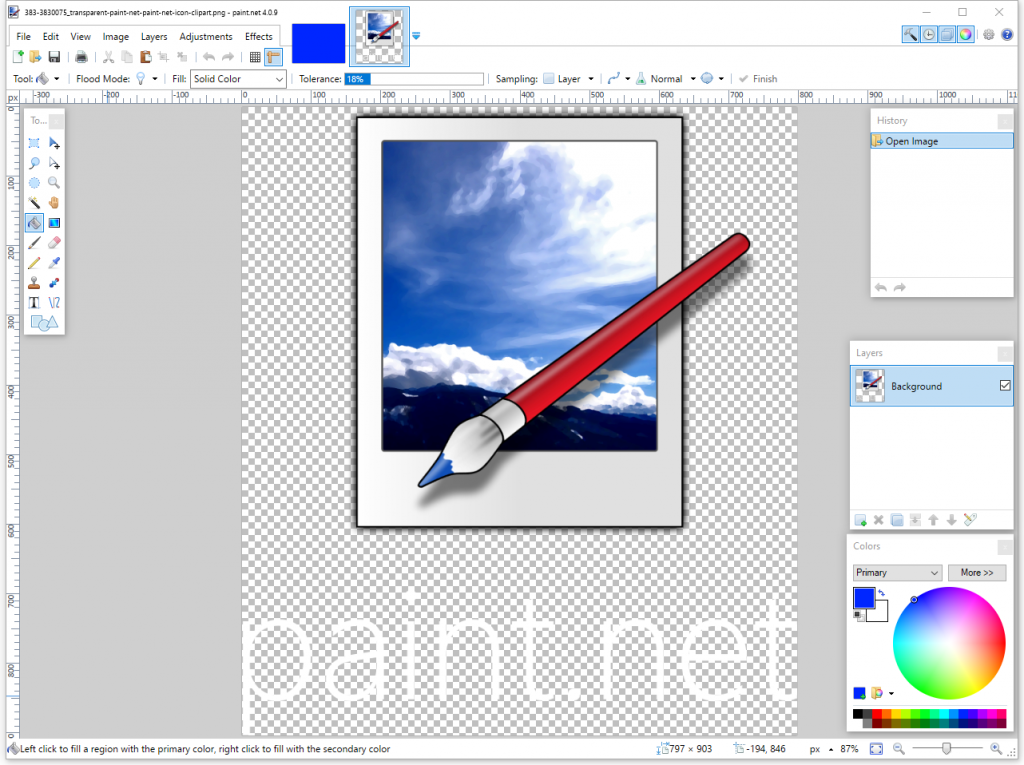
Secondly, we need to open the logo image file in Paint.NET. Click “File” in the top menu bar and select “Open”.

This will launch the “Open” window, where you choose the logo image file and click the “Open” button.
Thirdly, let’s copy the logo to the layer “Logo”.
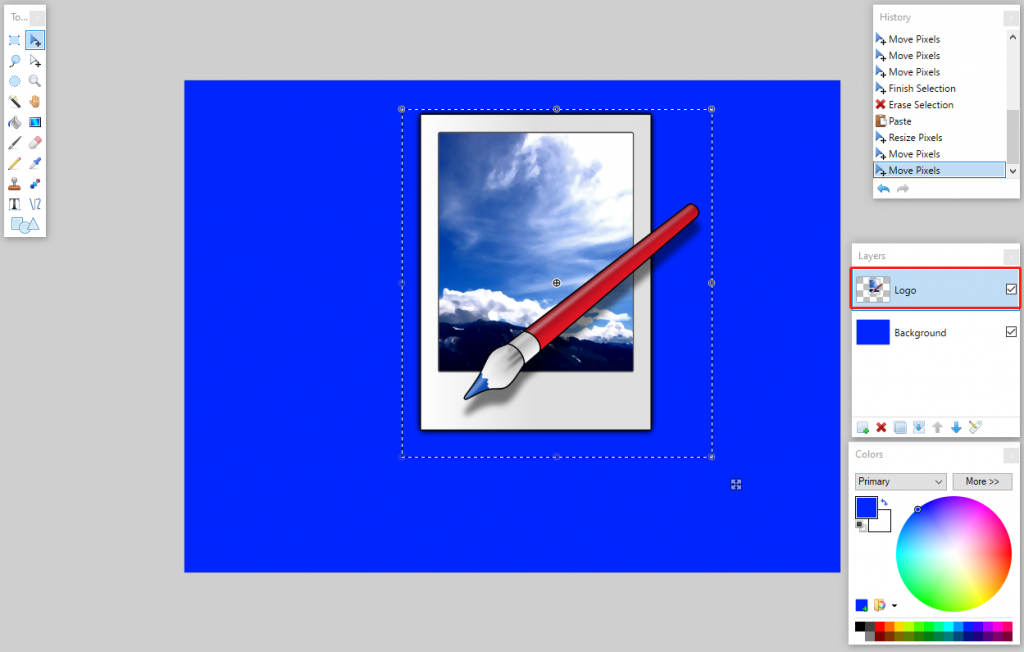
Select the “Rectangle Select Tool” in the Toolbox by clicking it.

Use your mouse to click and drag a rectangle to select the logo image, and click “Edit” in the top menu bar and select “Copy”.

Now switch back to our image by clicking its thumbnail on the top bar.

Click “Edit” in the top menu bar and select “Paste”. You can use your mouse to drag to adjust the position and the size of the pasted image.
Finally, press “Ctrl + D” to cancel the selection area. Now a layer with the logo image is created.