4. How to Create a Background Layer
In order to create a layer in Paint.NET, you will need to create an image first. When you first launch Paint.NET, you will need to click “File” in the top menu bar and select “New”.

This will launch the “New” window. In this window, you can define the Image Size dimensions. In this case, we input 800px as width and 600px as height.

Once you have input the sizes, click “OK” and your first layer will be displayed on the right side of the UI window in the “Layers” section. This layer will be titled “Background”.

The Background Layer is white by default. Now, let’s change it to blue.
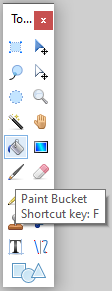
First, select the Paint Bucket took by clicking it using mouse.
Then, in the Colors Palette (located at the right bottom part of the UI Window), change the Primary color to blue by selecting it.

Finally, click anywhere in the Background image and the whole background image will become blue now.
