Convert HEIC to JPG PLUS Quick Start Guide

This online tutorial is for Convert HEIC to JPG PLUS users so that they can make use of the app better.

Sponsored Links

In this quick-start guide, we cover the following topics: differences between the limited trial and the full version, 3 Steps to convert .HEIC files to JPEG/PNG/BMP, how to add files, how to adjust settings including JPEG compression quality factor, how to start converting, how to open converted images, what to do if the conversion failed.
Differences between the limited trial version and the full version

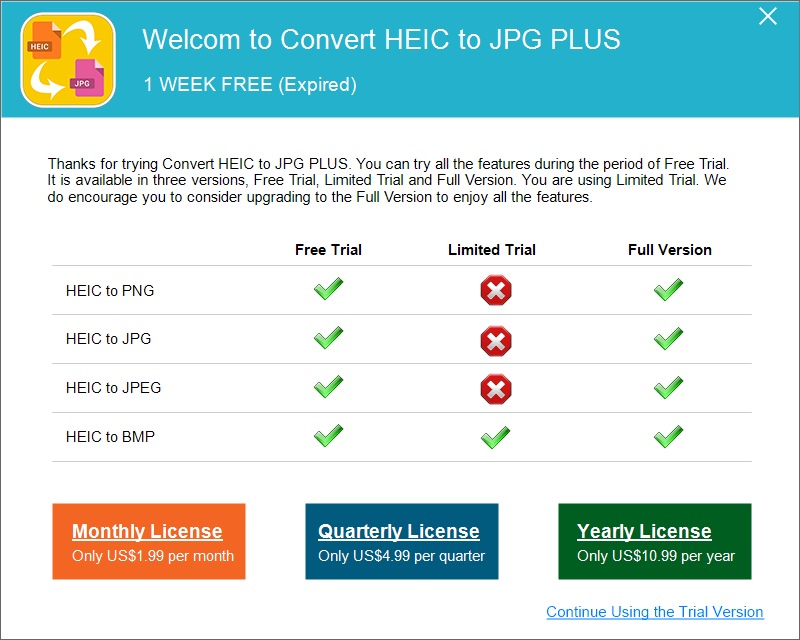
You can use all the features in both the one-week free full trial version and the full version while in the limited trial version you can only convert your files to BMP but no other formats.
3 Steps to Convert .HEIC Files to JPEG/PNG/BMP

  • Add files to the tool
  • Config and start converting (Adjust JPEG Compression Quality Factor if required)
  • Open converted image files

Step 1 – Add Multiple Files to Convert

There are two ways to add files to the conversion tool.

Sponsored Links

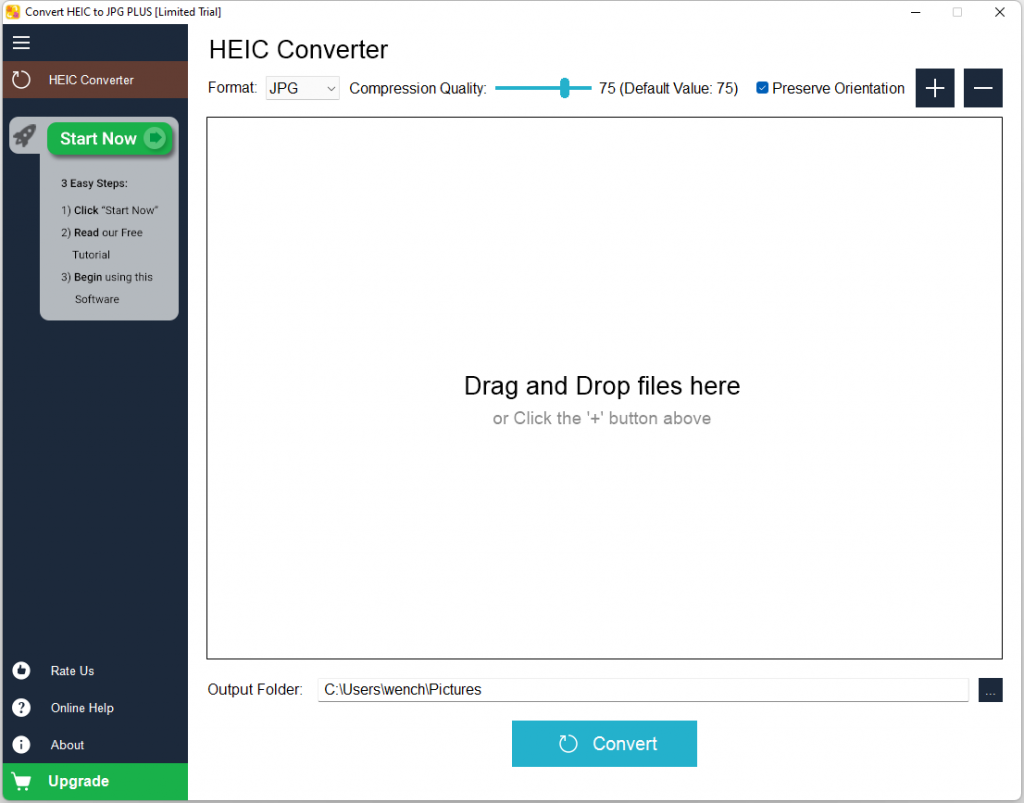
Method 1, drag the file(s) from File Explorer and drop them into the area marked as “Drag and Drop files here” in the app.

Method 2, click the “+” button, select one or multiple files, and then click the button “Open”.

How to Remove Files?

To remove all files from the list, you can click the “-” button at the right top corner.

To remove on file from the list, you can click the file to select it, then right click and select the menu “Remove it From List”.

Step 2 – Config and Start Converting

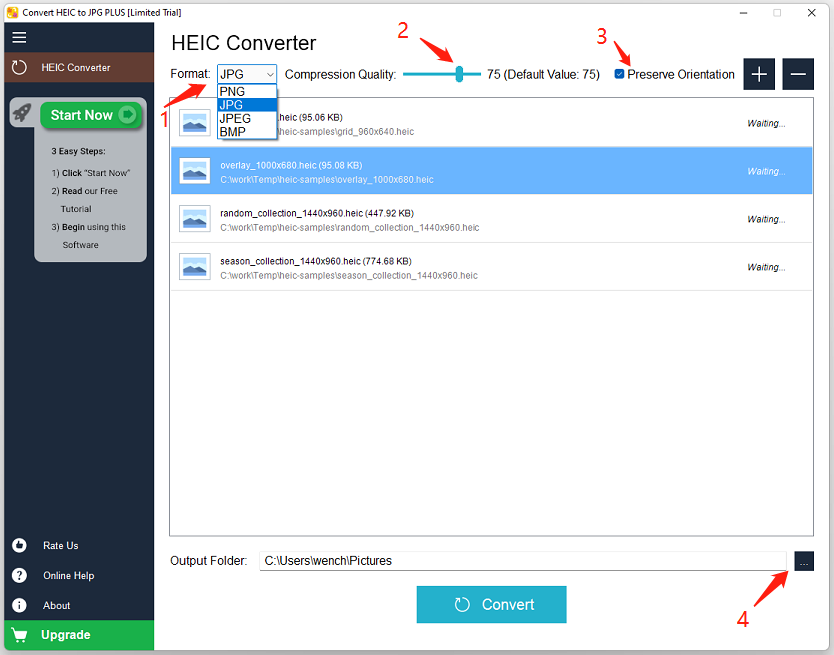
First, select the correct convert format. Click the dropdown list and select the one that you want.

Sponsored Links

Screenshot:

Second, optionally, for JPG/JPEG, you can adjust the Compression Quality Factor. If you don’t know what this factor is, please don’t change it. The default value is 75, and you can use your mouse to drag the cursor on the slider to change it.

Third, optionally, check/uncheck the option Preserve Orientation. If you want the converted images to be the same orientation as the original HEIC images, please keep this option checked.

Fourth, change the Output Folder if required.

Finally, click the button “Convert” at the bottom and the conversion process will start now.

Note 1:  the files in the list are processed one by one from top to bottom. The file which is being converted is also highlighted, and the right column displays the process status of  the file.

Note 2: if you are using the limited trial version, and you select PNG, JPG or JPEG as the destination format, after clicking the button “Convert” you will be see a purchase window, because converting to these formats are only for the full version.

Step 3 – Open Converted Files

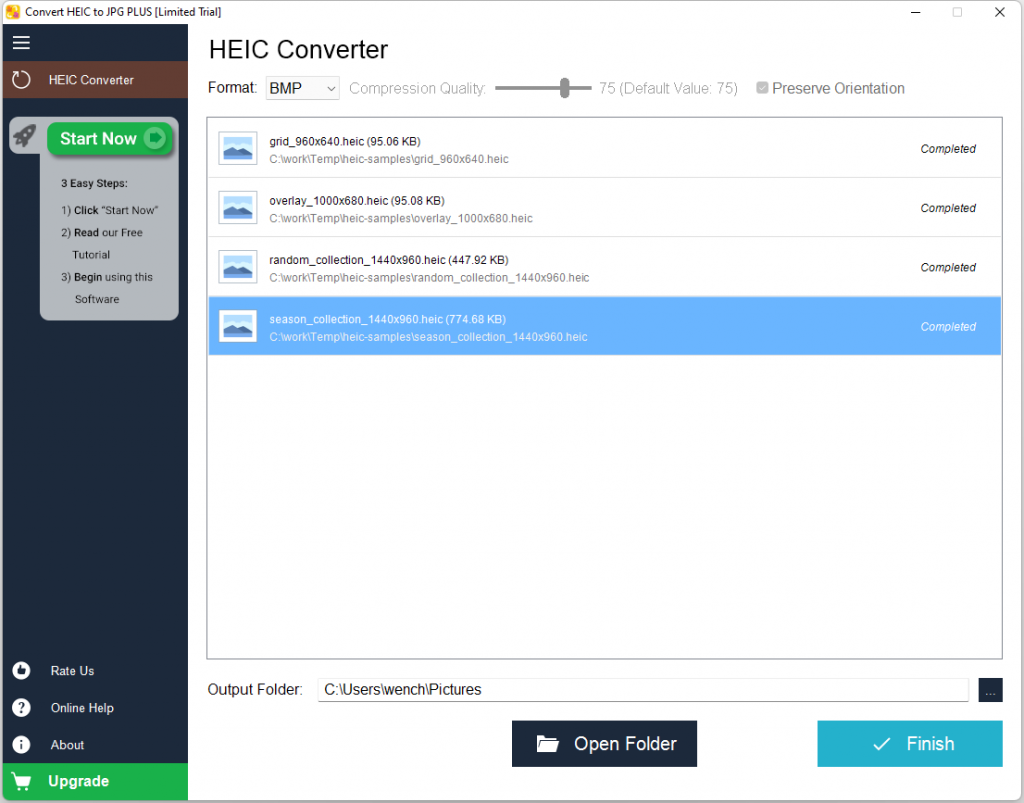
When the conversion process is complete, the app allows you to open the output folder and view the converted files.

Sponsored Links

Screenshot:

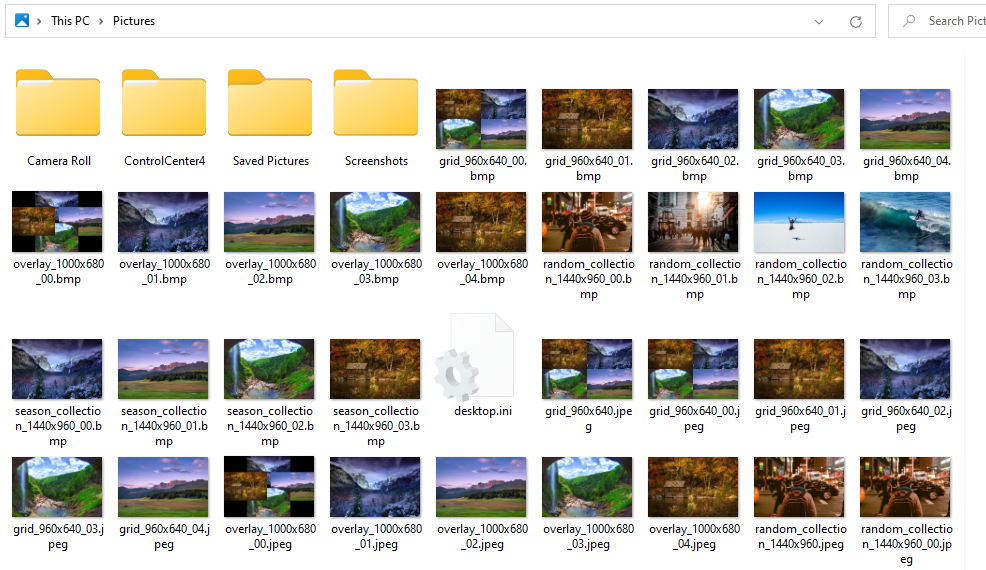
Click the button “Open Folder” to open the output folder, and you will find all the converted files there. Now you can open them by double clicking them to start your default image viewer for this format.

Note: because one HEIC file may contain multiple images, all these multiple converted image file names will be the original HEIC file name followed by “_” and a tow-digit number.

If you want to convert some other files, just click the button “Finish”, and the app will return to the starting UI and you can select new files now.

What to Do if the Conversion Failed?

If one HEIC file fails to convert in the app, we kindly ask you to follow the instructions below.

Sponsored Links

First, please close other apps in your PC if there are any, to give this enough RAM to process the conversion.  Try one more time for that specific file only.

Second, if the re-try still fails, please send an email to us with that file sample. We will try our best to help you.

E-mail Support

If you have any further questions or feed-backs about the app, please feel free to reach us by email. We are here to listen and help.