Step 2 – Config and Start Converting
First, select the correct convert format. Click the dropdown list and select the one that you want.
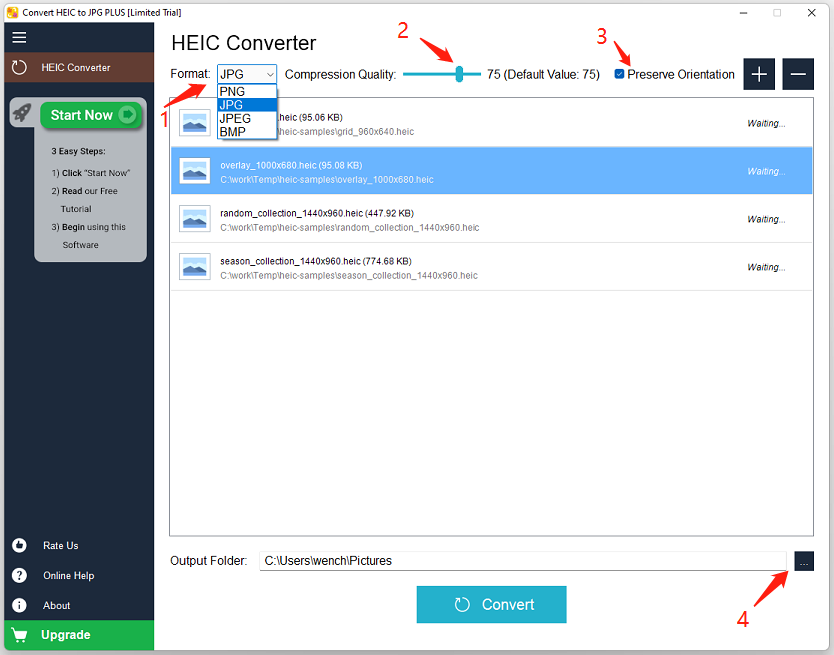
Second, optionally, for JPG/JPEG, you can adjust the Compression Quality Factor. If you don’t know what this factor is, please don’t change it. The default value is 75, and you can use your mouse to drag the cursor on the slider to change it.
Third, optionally, check/uncheck the option Preserve Orientation. If you want the converted images to be the same orientation as the original HEIC images, please keep this option checked.
Fourth, change the Output Folder if required.
Finally, click the button “Convert” at the bottom and the conversion process will start now.
Note 1: the files in the list are processed one by one from top to bottom. The file which is being converted is also highlighted, and the right column displays the process status of the file.
Note 2: if you are using the limited trial version, and you select PNG, JPG or JPEG as the destination format, after clicking the button “Convert” you will be see a purchase window, because converting to these formats are only for the full version.