Real Paint Online Tutorial

In this online tutorial, we cover the following topics: how to open/import an image, how to enhance your photo, what are layers and how to combine images, how to add text, how to crop, rotate and flip, how to save and export a completed image.

Sponsored Links

How to open/import an image

There are at least 2 methods to open/import an image to Real Paint.

Method 1: use the menu. Click “File” -> “Open” to open the Open image dialog, navigate and select the image file, and then click the button “Open” to open it.
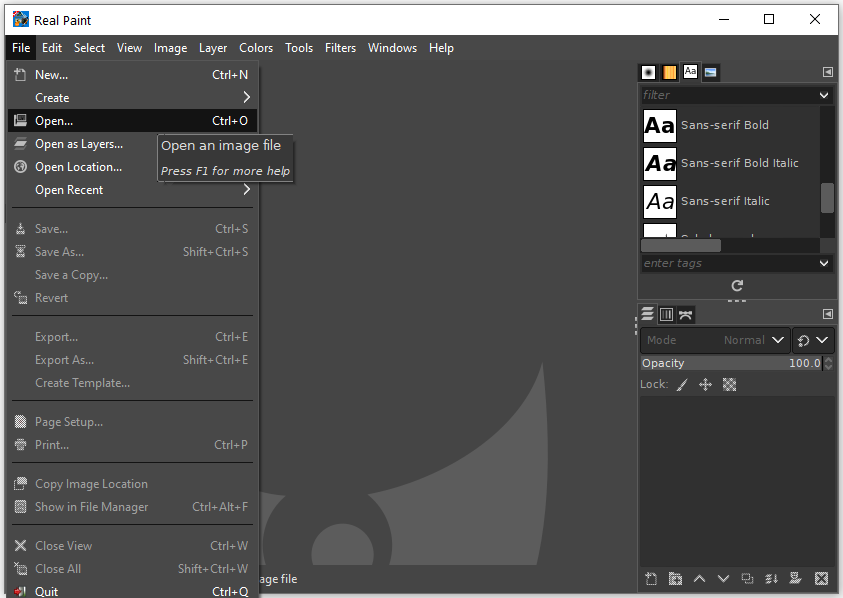
Method 2: drag and drop. Drag and drop a file onto Real Paint to open the file. Drag an image into an open Real Paint image to add dropped file as a new layer, or set of layers, to the already open image.

Note: if you choose to import a PDF file or a PostScript file, there is an extra step for you to select the options: page selection, open pages as, image size and etc.
How to enhance your photograph?

One common reason that we need an image editor is to fix digital camera images that are less than perfect. With Real Paint, you can easily improve colors, adjust sharpness, and do a lot more.

Sponsored Links

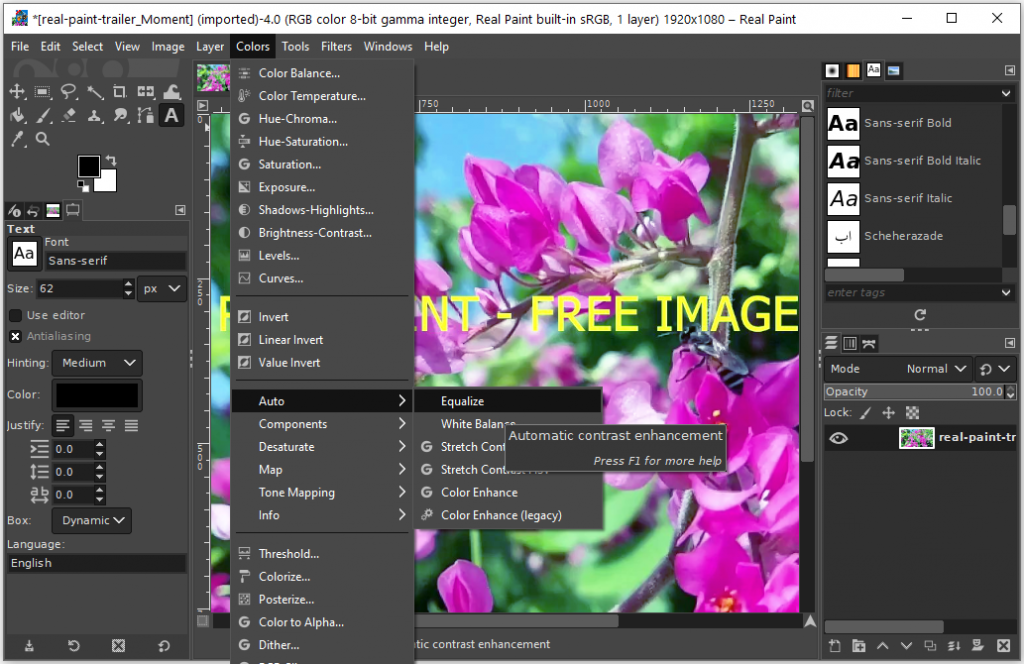
Improving colors – Real Paint provides several automatic color correction tools including Equalize, Color Enhance, Stretch Contrast, Stretch HSV, White Balance and Auto Levels. Please try them out and they will give you an idea of the possibilities inherent in the image. You can access these tools, except for Auto Levels, by following the menu path “Colors” -> “Auto”. You can access the Auto Levels tool by following the menu path “Colors” -> “Levels”. 

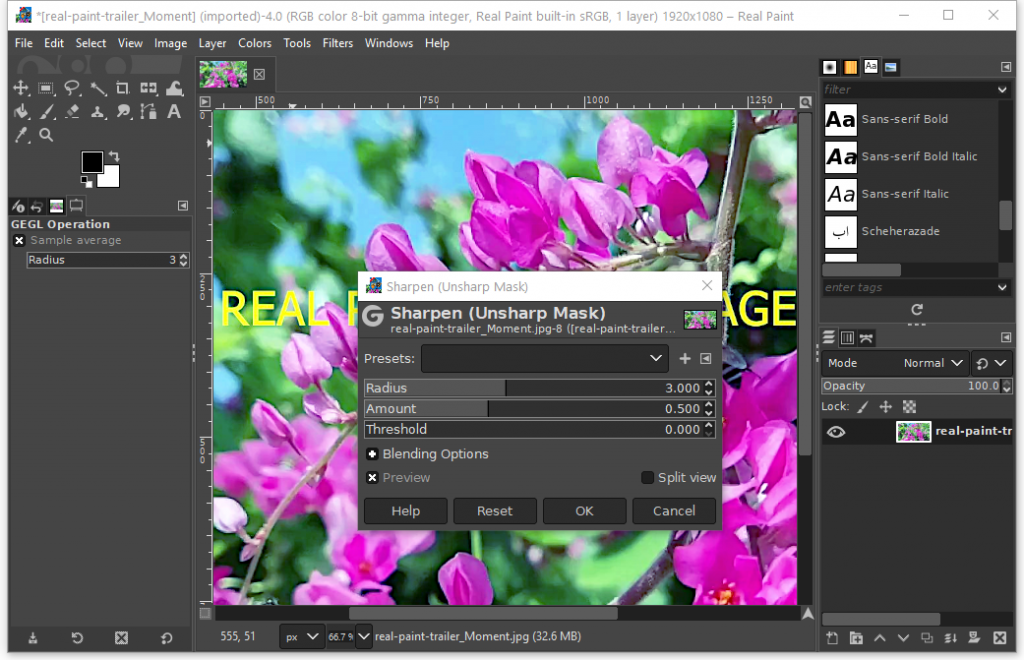
Adjusting sharpness – unblurring, reducing graininess and softening. The unblurring tool can be accessed as “Filters” -> “Enhance” -> “Sharpen (Unsharp Mask)”. The purpose of it is to make the image sharper. Reducing graininess can be achieved by using the filter called “Selective Blur” or the filter called “Despeckle”. Softening can be achieved by using the filter “Blur” (“Filters” -> “Blur” -> “Blur”).

Layers and Combining Images

Using layers, you can combine multiple images into one. Layers is a stack of slides, each of which contains a different part of the image and can be separately manipulated without affecting other parts. Layers are stacked on top of each other. The bottom layer is the background, and the other layers are stacked on it one by one.

Sponsored Links

Screenshot:

Here are 4 common steps to create a complex image.

Step 1 – open an existing image, or create one new one-color image as the background layer.

Step 2 – add one or more layers containing different new image components. These different components could be copied from other images with transparent background.

Step 3 – add one or more layers of text as title, sub-title and/or descriptions.

Step 4 – once all the layers are in the correct position, flatten the layers and export the image into PNG or JPEG.

How to Add Text

In Real Paint, text is managed with the Text tool, which can be accessed directly from the tools palette or by following the menu “Tools” -> “Text”.

Sponsored Links

Screenshot:

By design, each text is on a new layer containing the text string. This new layer is above the current layer in the layer dialog, with the size of the text box.

The text layer can be operated in the same ways as any other layer. In addition, compared to a normal layer, the text layer contains more information to allow you edit the text in the text-editor window.

How to Crop, Rotate and Flip

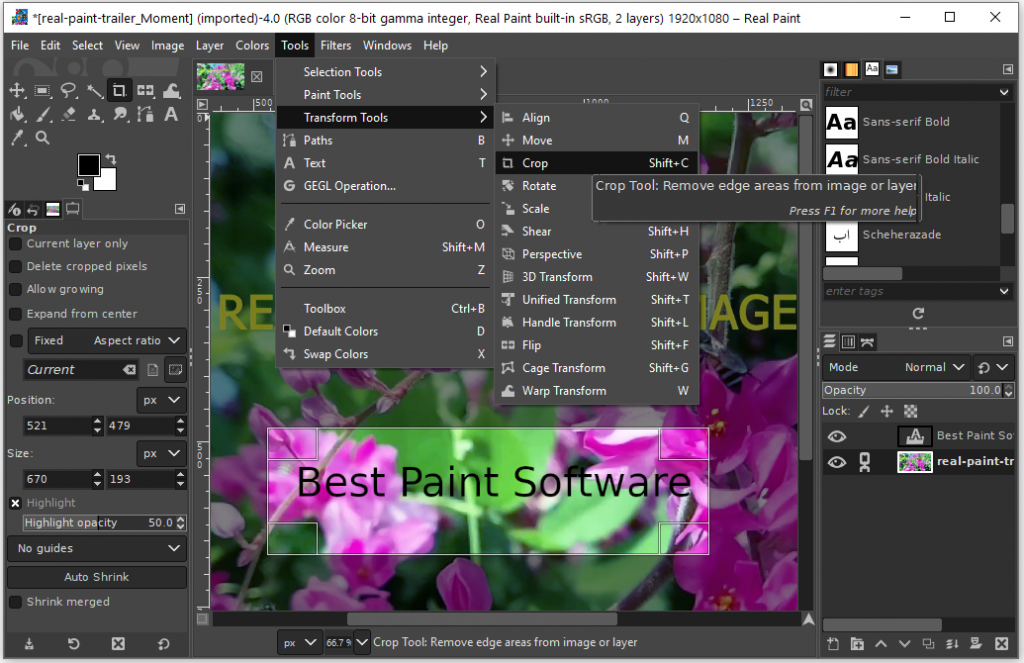
In order crop an image, you need to activate the Crop tool first. You can do so by clicking the tool directly in the tool palette, or following the menus “Tools” -> “Transform Tools” -> “Crop”. With the tool activated, you use your mouse to draw a rectangle in the open image. The region in the rectangle is the region to crop. You can also fine adjust this region by adjusting the four corner’s positions of the rectangle. Once you are satisfied with the region, press the “Enter” key on your keyboard, and the crop is done. 

Sponsored Links

Screenshot:

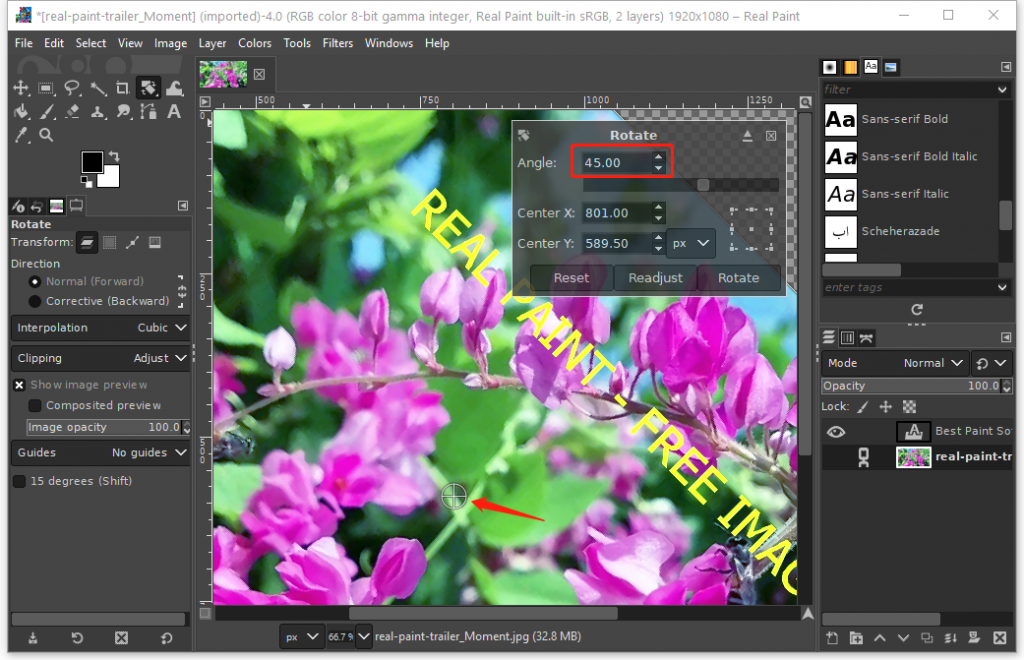
In order to rotate an image, you need to open the rotate dialog by following the menus “Tools” -> “Transform Tools” -> “Rotate”. In the dialog, input the angel, adjust the center position if required, and then click the button “Rotate”.

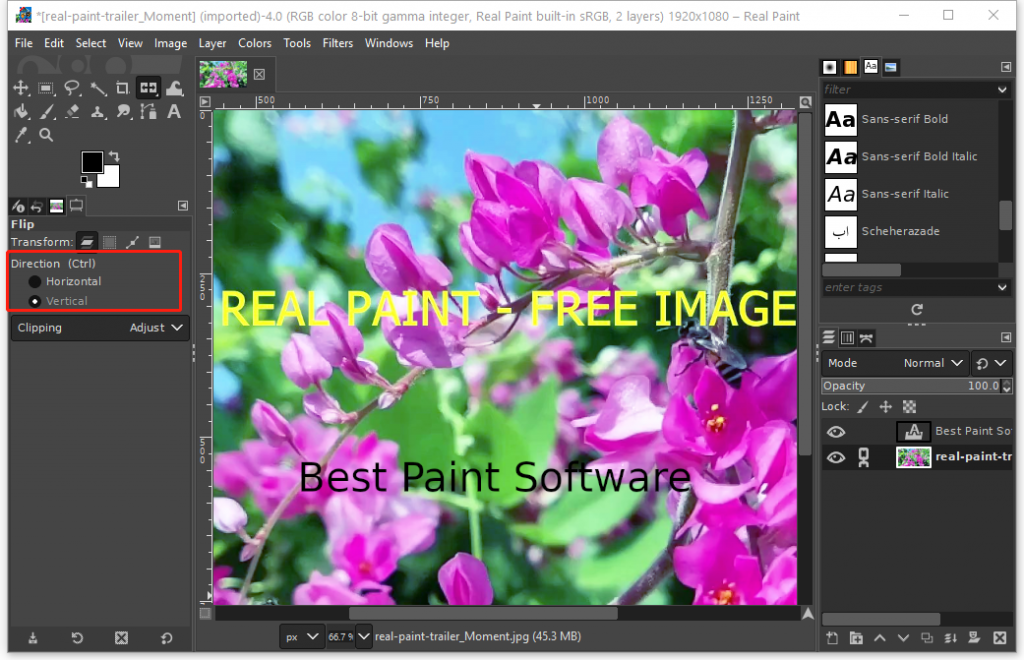
In order to flip an image, you need to open the image first. Then open the Flip tool by following the menus “Tools” -> “Transform Tools” -> “Flip”. You choose the option “Horizontal” or “Vertical” and then use your mouse to left click the open image. The image will be flipped immediately.

How to Save and Export an Image

While you are working on your image, we recommend you use XCF format to save it. This format saves everything, such as layers, so that you can easily modify any part of an image later.

Sponsored Links

Once you are done with your image, we recommend you save it using XCF format, and in addition, we recommend you export the image to a more popular format like JPG or PNG.

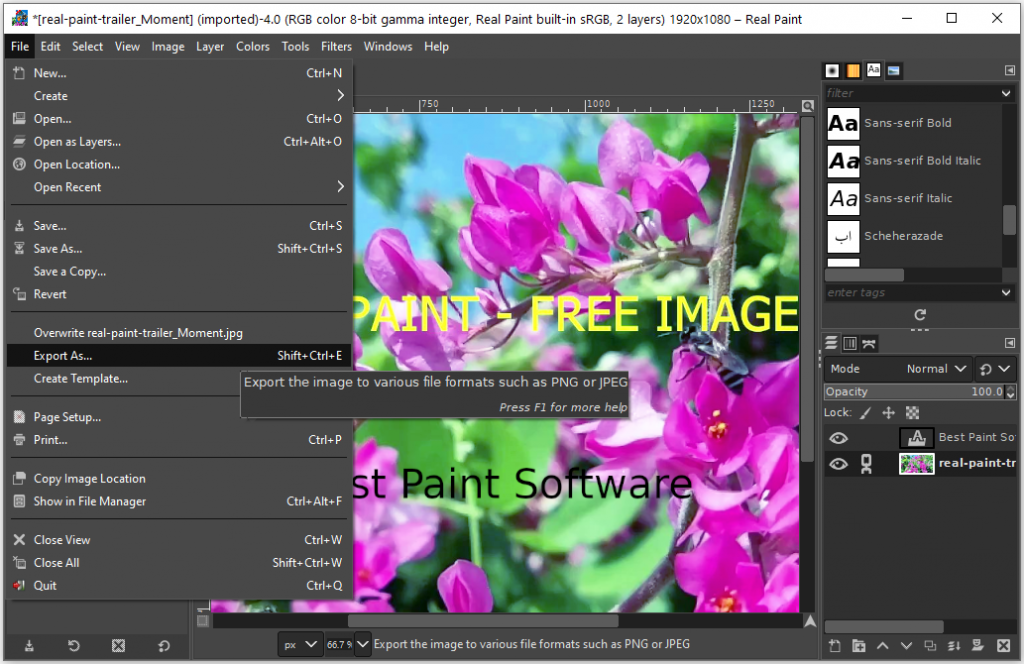
In order to export an image, follow the menus “File” -> “Export As”. In the dialog, you edit the filename and extension directly, and then click the button “Export”.

E-mail Support

Real Paint is a very complex software, and the guide above is just a much-simplified version to let you quickly start. If you have any further questions or feed-backs about the app, please feel free to reach us by email. We are here to listen and help.