Photo Editor Max Online Tutorial

Photo Editor Max is a comprehensive Image editor that provides all the tools that you need to edit and create images.

Sponsored Links

In this tutorial, we cover the following topics: What formats are supported? How to create a new painting? How to draw a gradient as the background? How to paste an image as a new layer? How to add text? How to save and export the painting? What other tools does the app offer?
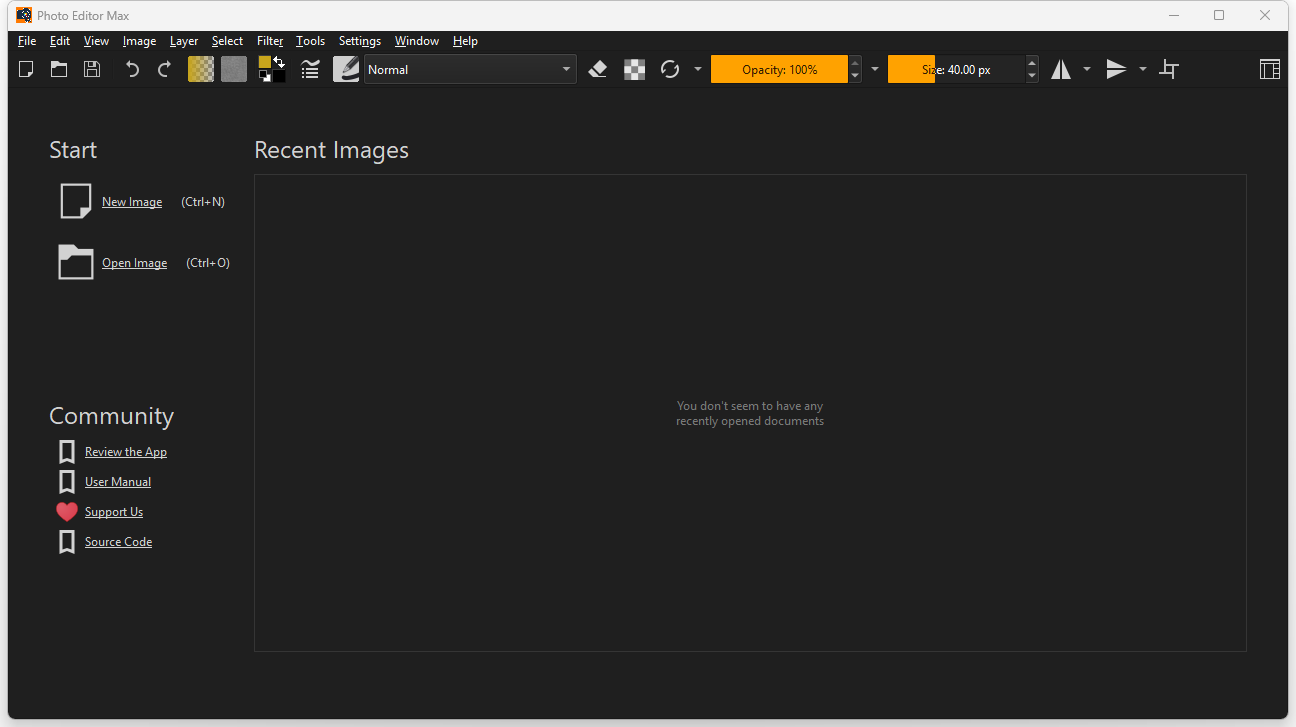
Main Features

  • Image Editor
  • Image Creator

Supported Formats

.KRA, .KRZ, .ORA, .KPP, .AVIF, .BMP, .EXR, .GIF, .HEIC, .JPEG, .JPG, .JXL, .PNG, .PSD, .TIF, .TIFF, .WEBP, .XCF.
How to Create a New Painting?

To create a new document in Photo Editor Max, follow these steps:

Sponsored Links

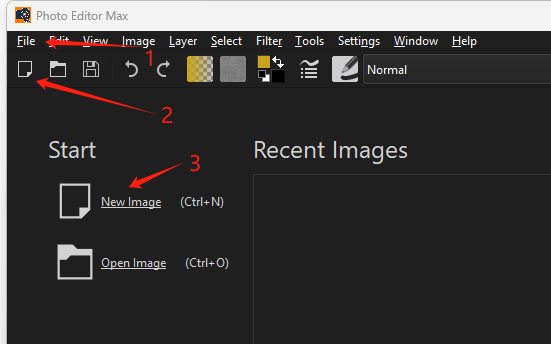
1, Select “File” -> “New” from the menu, or click the New icon in the toolbar, or click the “New Image” link in the front page.

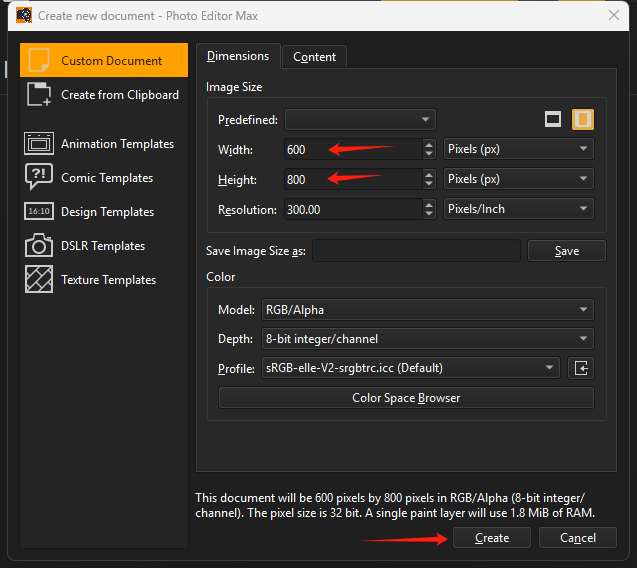
2, In the Create new document window, specify the width and height, and click the “Create” button.

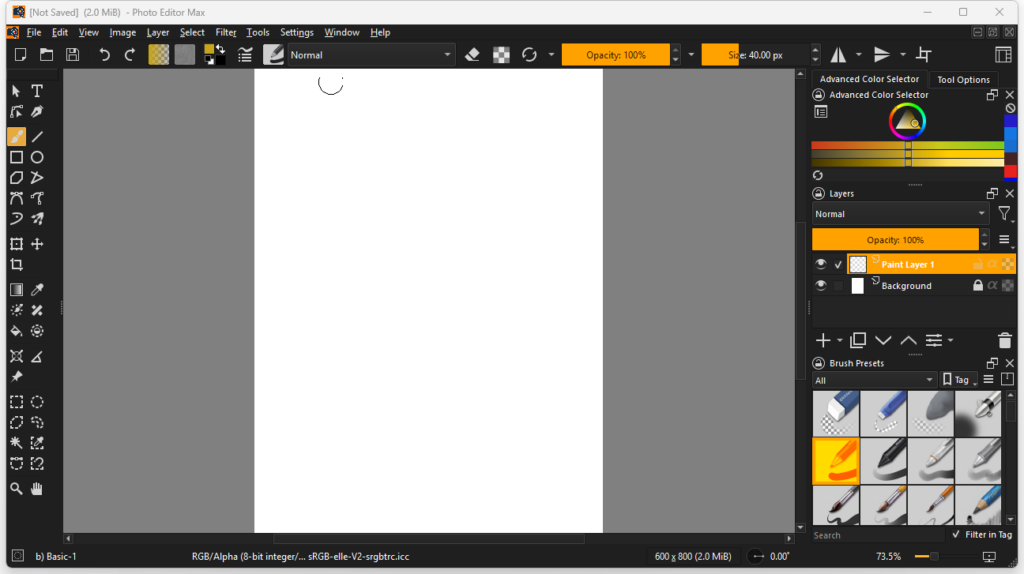
3, A new blank image will now be created.

How to Draw a Gradient as the Background?

In the newly created image, you will notice:

Sponsored Links

1, There are two layers in the image. Layer 1 is the Background and layer 2 is called Paint layer 2.

2, The default selected tool in the left-hand toolbar is the Freehand Brush Tool.

To draw a gradient as the background, follow these steps:

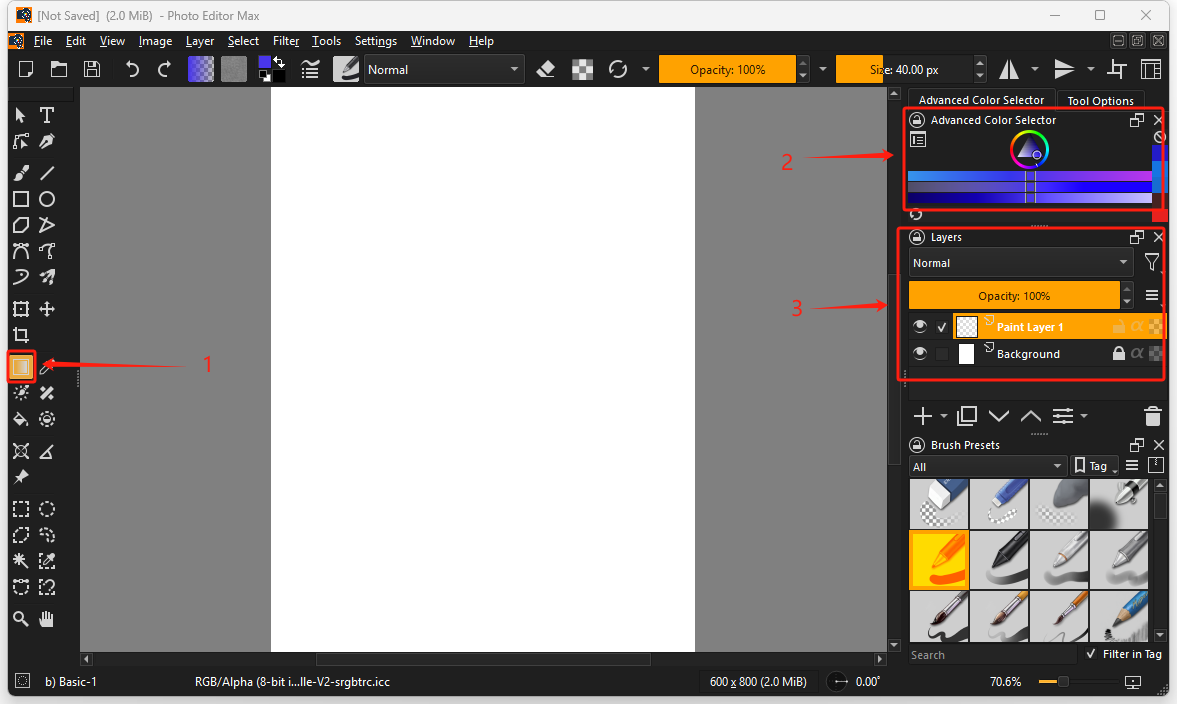
1, In the left-hand toolbar, select the Draw a gradient tool.

2, In the Advanced Color Selector, choose the color that you want to use.

3, In the layers panel, make sure Paint layer 1 is selected.

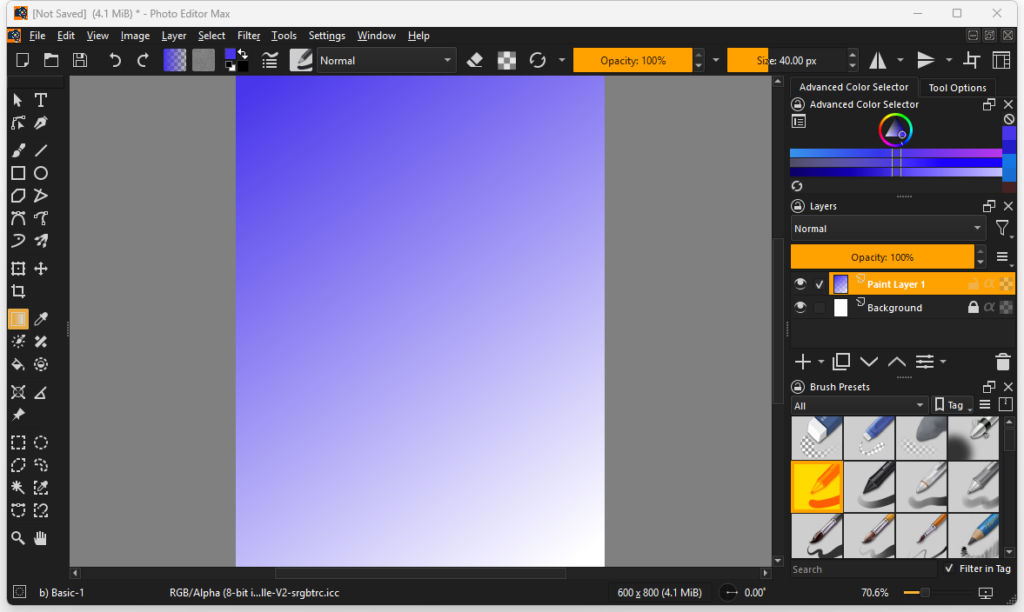
4, In the blank image, click and hold the left mouse button at the upper-left corner, drag a line to the bottom-right corner, then release the button. A blue gradient background will be generated.

How to Paste an Image as a New Layer?

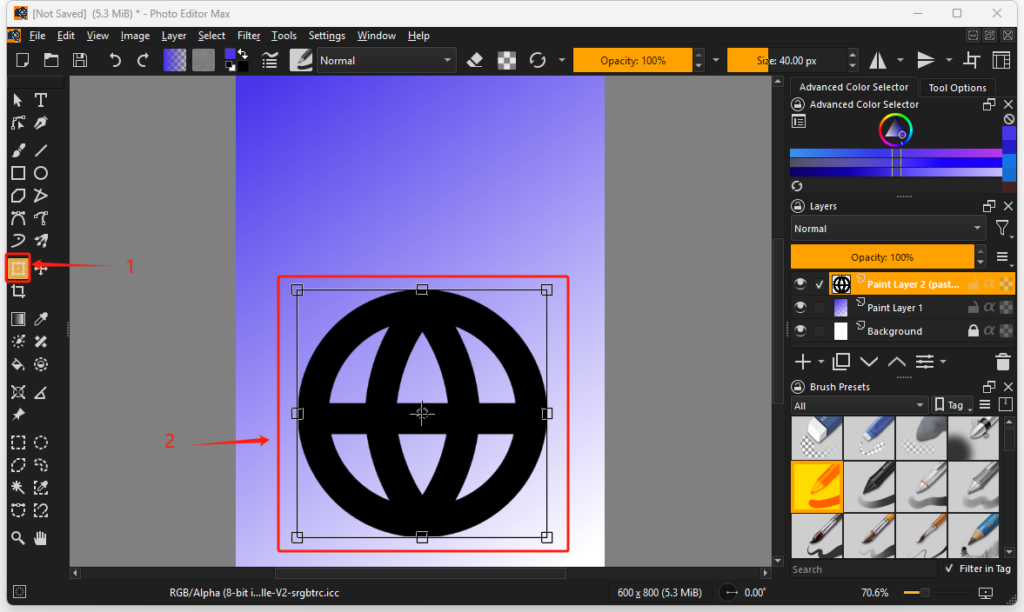
Now we want to copy a transparent image into our newly created image. We will use the following icon as the source: https://www.flaticon.com/free-icon-font/globe_3917571?related_id=3917571 .

Sponsored Links

To paste an image as a new layer in Photo Editor Max, follow these steps:

1, Make sure the source image has been copied to the clipboard. (Open the link above in your browser and click the “COPY PNG” button).

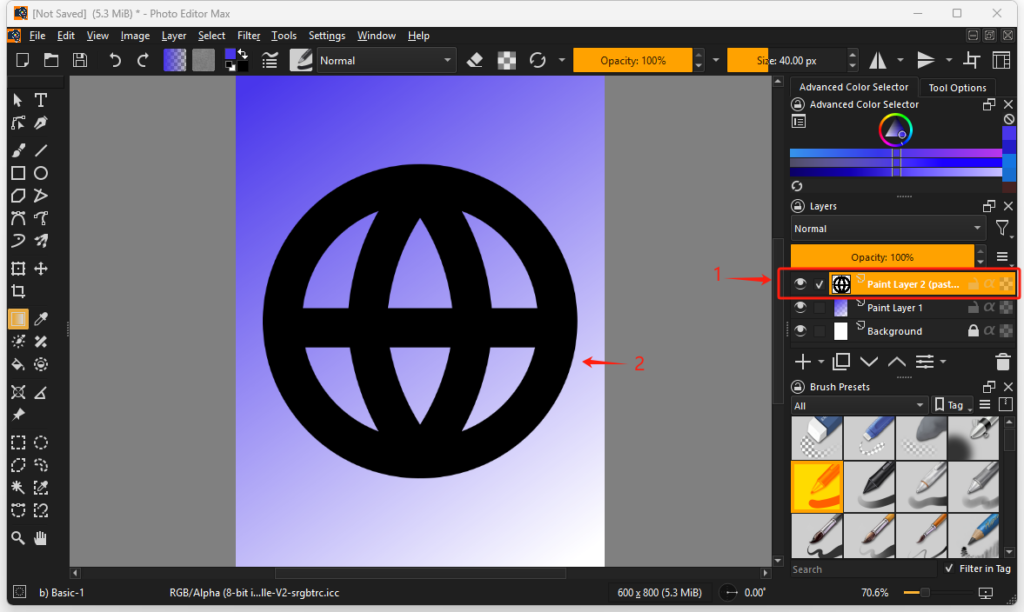
2, In Photo Editor Max, press Ctl+V. The app may ask you which color profile to use when interpreting the pasted data — choose “As Web”. Now a new layer called “Paint layer 2 (pasted)” will be created and automatically selected. The source image is now pasted into this new layer.

3, In the left-hand toolbar, select the Transform a Layer or a Selection tool. Use your mouse to make the pasted image smaller and move it to the position where you want it to be.

How to Add Text?

Now we want to add a title to our image.

Sponsored Links

To add text in Photo Editor Max, follow these steps:

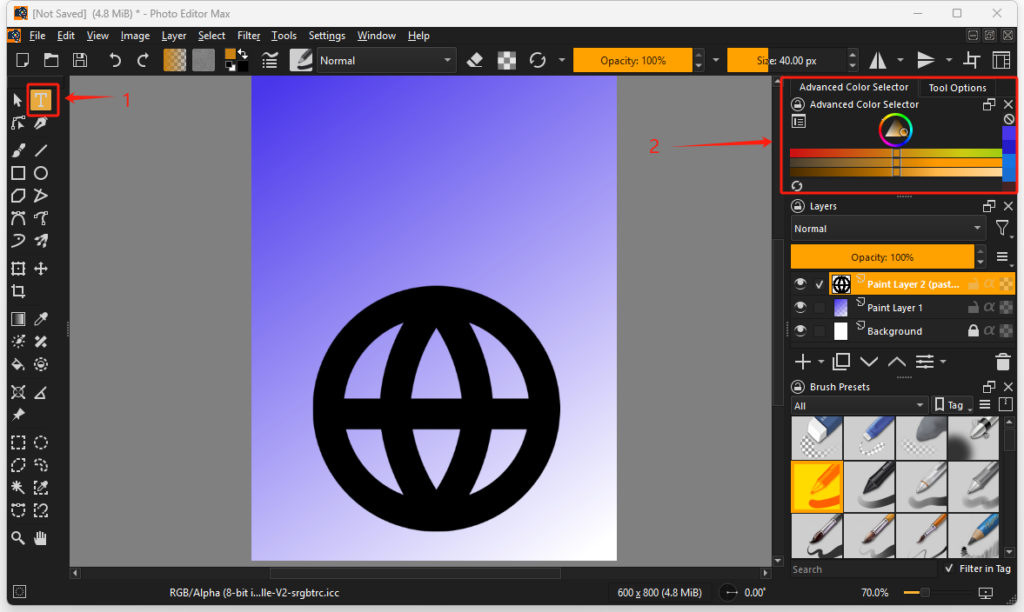
1, In the left-hand toolbar, select the Text tool.

2, In the Advanced Color Selector, select the color that you want to use.

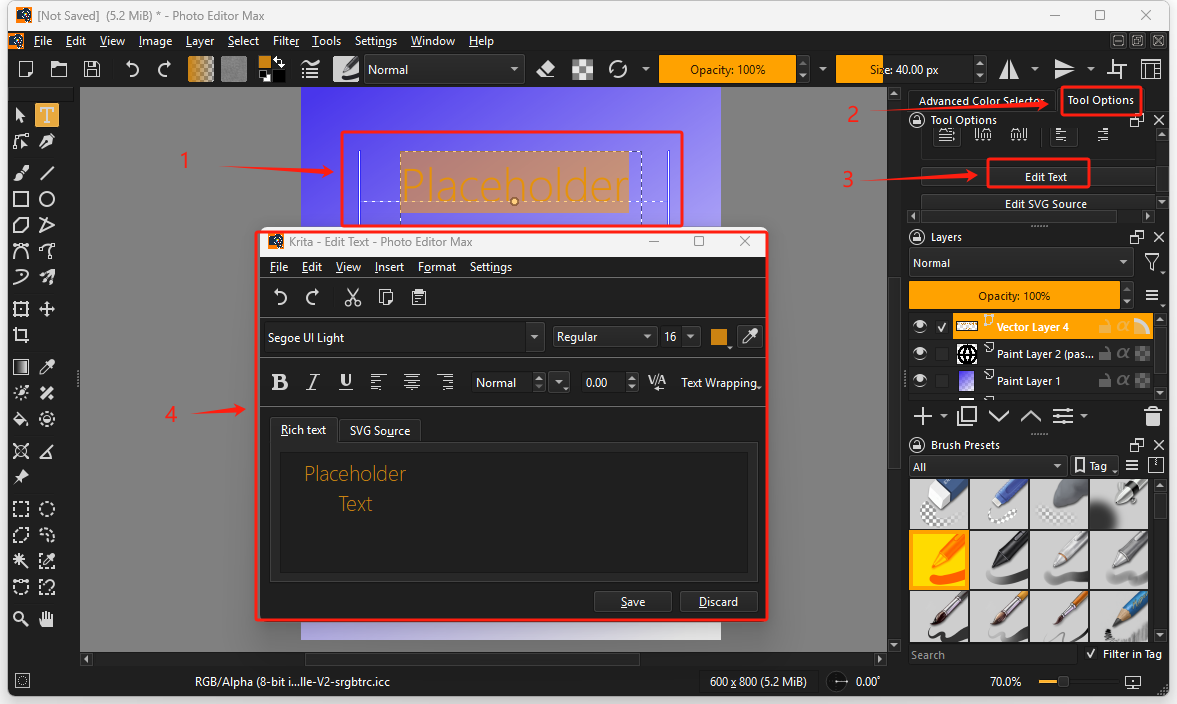
3, On the image, use the left mouse button to draw a rectangle. A text box with the placeholder text “Place holder” will appear inside the rectangle. Select the “Place holder” text, then go to the top right corner, click “Tool Options”, and then click the “Edit Text” button. A Edit Text window will appear.

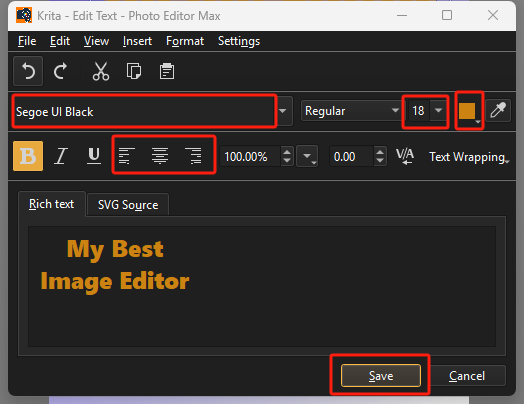
4,In the Edit Text window, you can change the font family, font size, alignment and more. When you are satisfied with the changes, click the “Save” button.

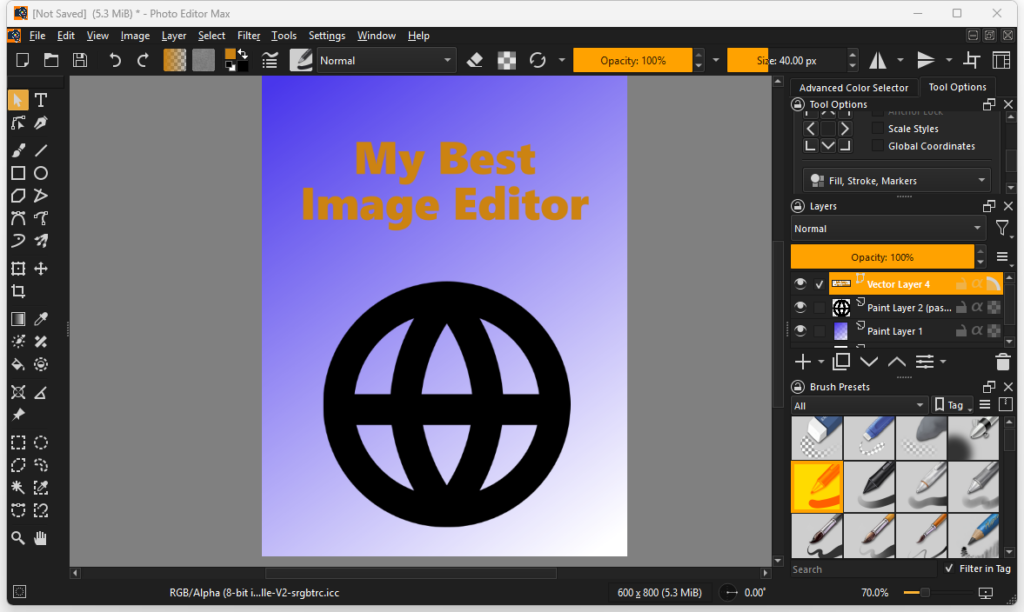
5, With the text is added, your image should now be like this.

How to Save and Export the Painting?

To save the painting, select “File” -> “Save”.

Sponsored Links

To preserve all metadata (layers, vector layers etc.), make sure to use the default .ktr format. This allows you to re-edit the painting in the future.

To export the painting, select “File” -> “Export”. You can export your painting to JPG or PNG file.

Now I have showed you how to create a new painting in Photo Editor Max.

What Other Tools Does the App Offer?

Photo Editor Max offers many other useful tools, including the Freehand Brush Tool, Shape Tools, Selection tools, and more. If you are interested in learning about specific features or have any questions, please feel free to email us.

E-mail Support

If you have any further questions or feed-backs about the app, please feel free to reach out to us by email. We are here to listen and help.