Real DJ Quick-start Guide

In this quick-start guide, we cover the following topics: 4 steps to start DJing with Real DJ, how to load local songs into the Library, how to play a song from the Library, how to sync/beat-match two tracks, how to record a mix, how to adjust the Equalizers and Grain knobs for each track, how to adjust the cross fade duration in Auto DJ.

Sponsored Links

4 Steps to Start DJing with Real DJ

Load local songs into the Library
Play songs from the Library
Sync/beat-match two tracks
Record your mix
Step 1 – Load Local Songs into the Library

In order to play songs in your computer, you need to load your songs into the Library of Read DJ.

Sponsored Links

Upon the first run of the app, a window pops up to ask you to pick your music folder. If you have a music folder, choose it; if not, you can pick any folder, even if there is no music files inside it. You are able to add and remove folders at any time later.

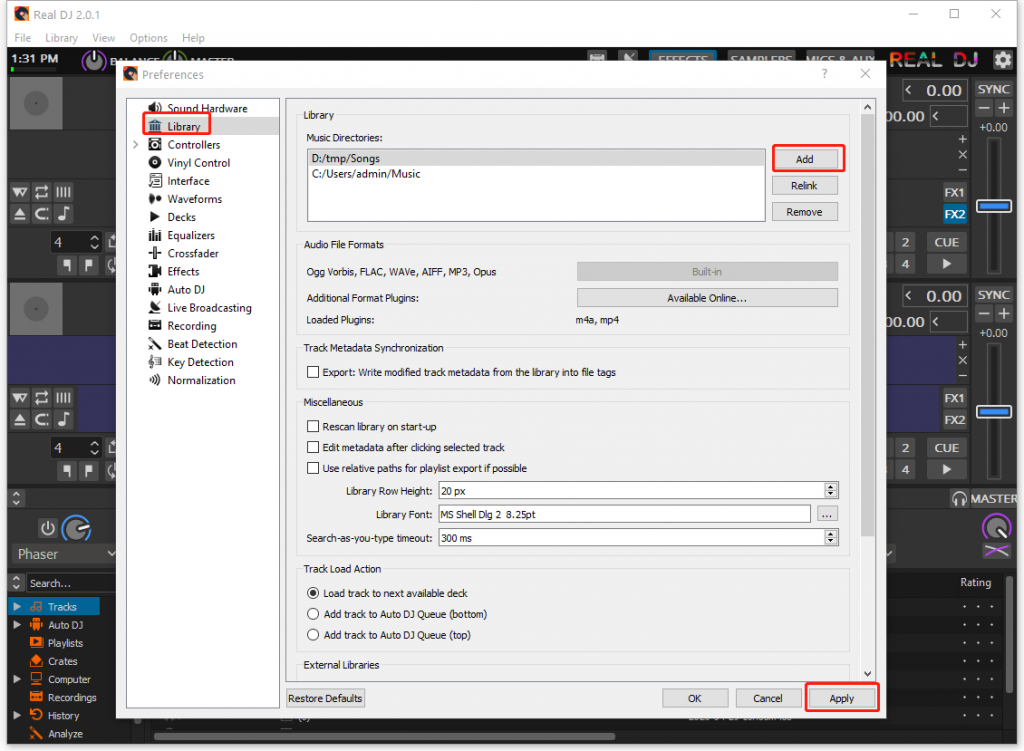
In order to edit the Library settings, click the menu “Options”, then click “Preferences” and select “Library”. You can add new music folders by clicking the “Add” button, and you can select an existing folder and click the “Remove” button to remove it.

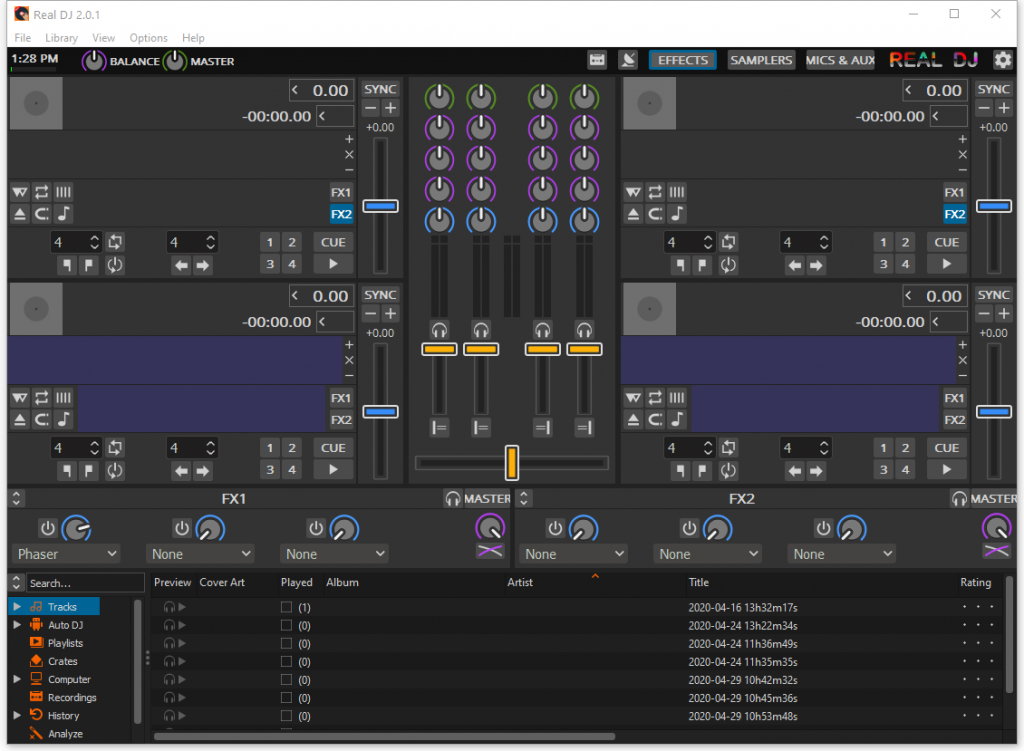
The Library panel is located at the bottom of the main window. After successfully loading your songs, you should be able to see all of them listed under “Tracks”. If not, you may need to click the menu “Library” and select “Rescan Library”.

Step 2 – Load a Song to One Deck and Play it

In Step 1, you can see all your songs under “Tracks” in the Library.  Now, select one of them, and right click it. In the context menu, select “Load to”, then “Deck”, and finally “Deck 1”. Now this song is loaded into Deck 1. This song will not be played automatically. In order to play it, you have to click the play button in Deck 1 (the small triangle button located at the right bottom corner of Deck 1).

Sponsored Links

Using the same steps, you can load another song into Deck 2 and play it.

Deck 1 and Deck 2 can play different songs at the same time.

Note: Deck 1 is always located at the top left part of the window. Deck 2 is located at the right top part. If there are Deck 3 and Deck 4, Deck 3 is located under Deck 1 and Deck 4 under Deck 2.

Step 3 – Sync / Beat-match Two Tracks

One common thing you would like to do is to sync the 2 songs that you are mixing together. The Sync and Rate controls in each deck are especially for this purpose. You can find these controls at the right end of each deck panel.

Sponsored Links

First, you pick the target deck music that you would like other tracks will sync with. Then, in other decks you click the button “Sync” and the music in that deck will automatically sync/ beat match with the target music.

Step 4 – Recording

Once you are satisfied with your mix, you can record it to a file.

Sponsored Links

There are two methods to do so.

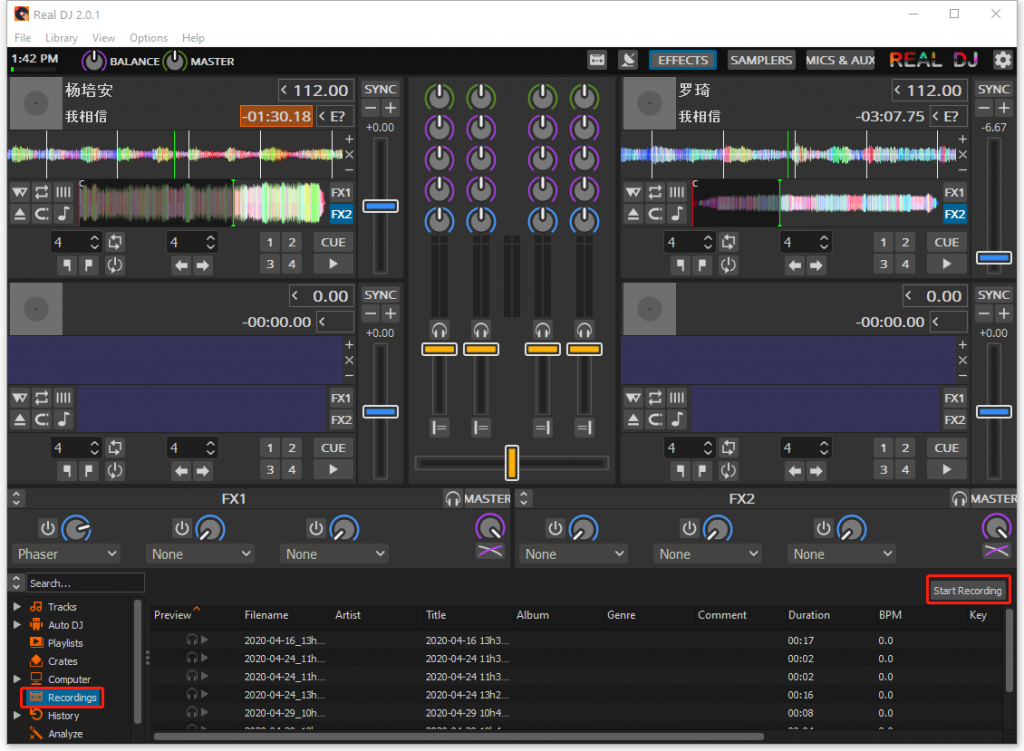
Method 1: in the Library, select the “Recordings” and then click the button “Start Recording” at the top right corner.

Method 2: in the top menu bar, click the menu “Options”, then select “Record Mix”.

For the recorded music, the default file type is .wav and the default destination folder is your personal Music folder. You can always change these settings in the Preferences. (Click the menu “Options”, then click the menu item “Preferences” and select “Recording”)

How to Use the Equalizers and Gain Knobs

The Equalizers allow you to change the filters of the audio. The low, mid and high EQ knobs allow you to selectively reduce or boost certain frequency ranges of the audio, to make a perfect effect.

Sponsored Links

The Gain knob allows you to adjust the gain applied to the deck. Do not turn the Gain Knob up so much that the level meter is in the red region. At that point, the track is clipping, which sounds bad and could damage equipment.

How to Adjust the Cross Fade Duration in Auto DJ?

The default cross fade duration in Auto DJ is 10 seconds. You can follow the steps below to change it.

  • Step 1: Click to select the “Auto DJ”
  • Step 2: Change the value in the text box
  • Step 3: Click the “Enable Auto DJ” button.

E-mail Support

Real DJ is a very complex software, and the guide above is just a much-simplified version to let you quickly start. If you have any further questions or feed-backs about the app, please feel free to reach us by email. We are here to listen and help.