Video Editor Max Online Tutorial

New to video editing and movie making? Looking for an easy-to-use video editor and movie maker? Video Editor Max is your answer. With our simple 5-step tutorial, you will be able to make your first video from photos and video clips in 5 minutes by yourself. No previous experience required. 

Sponsored Links

This tutorial is for Video Editor Max users so that they can know and make use of the app better. 
In this online tutorial, we cover the following topics: 5-step quick-start guide for beginners; how to add titles? what to do if I want to learn more advanced skills?

5-step quick-start guide for beginners

This guide will show you how to quickly make a video using your photos and short video clips.

Step 1, import media files.

Step 2, arrange photos and videos on timeline.

Step 3, add music to timeline.

Step 4, preview your project.

Step 5, export your video.

Note: Video Editor Max is a product by XiaoyaLab. At XiaoyaLab, we focus on these areas: PC optimization and cleaning, video processing and converting, audio processing and converting, video editing, image process and converting, etc.

Step 1, Import Media Files

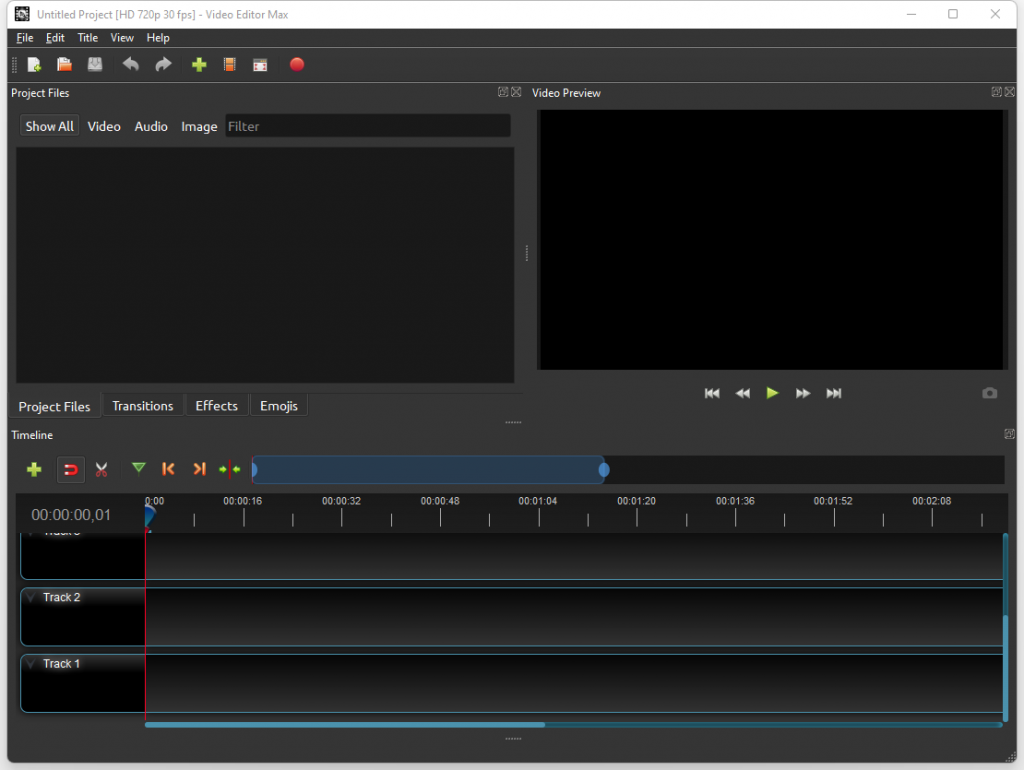
When you open Video Editor Max, by default, it starts a new project.  The first step to make a video is to import your prepared media files (including photos, video and audio files) into the project.

Sponsored Links

There are three ways to import your prepared media files. 

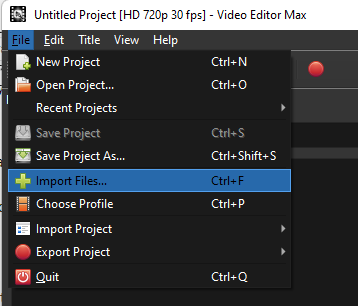
Method 1, click the menu “File” -> “Import Files”, choose the files and click the button “Open”.

Method 2, click the button “+” in the toolbar. It does the same thing as above.

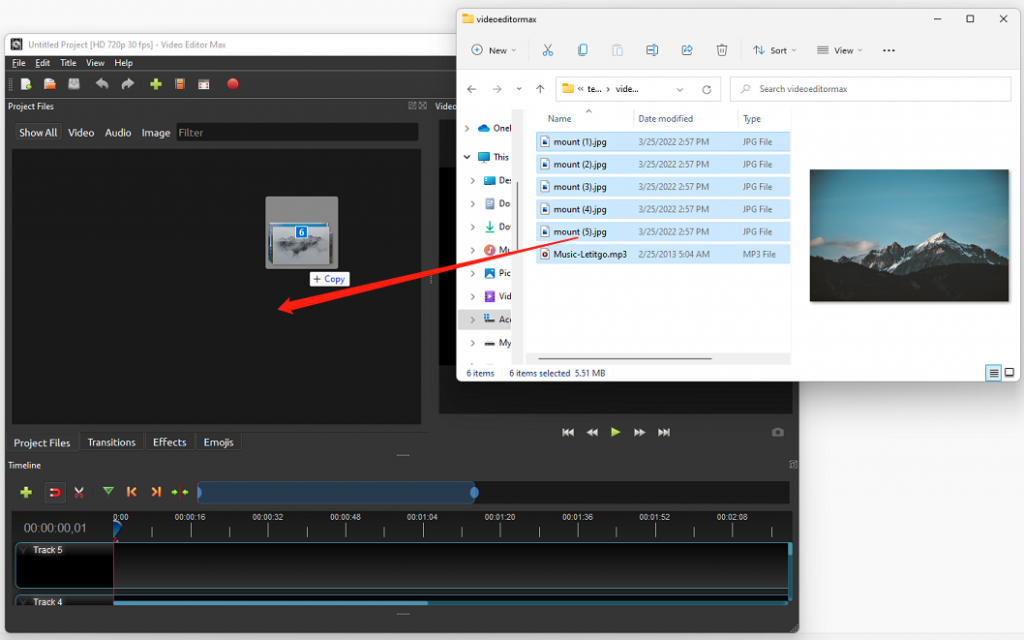
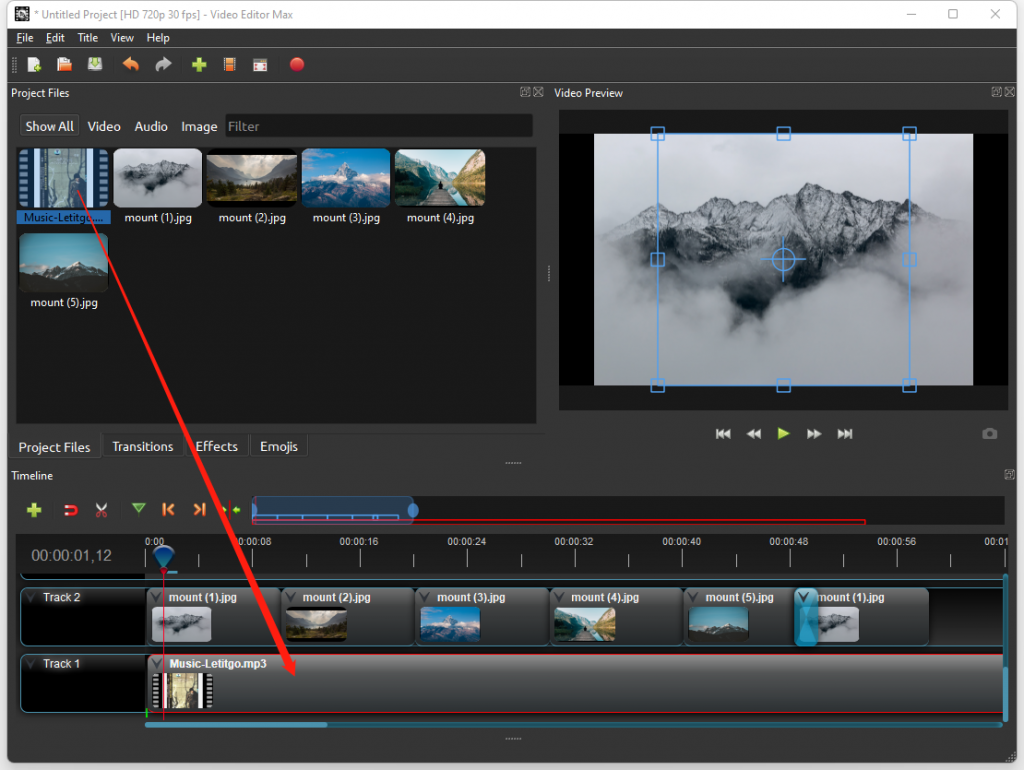
Method 3, directly drag and drop the media files from file explorer to Video Editor Max. Be sure to drop the files where the arrow is point to.

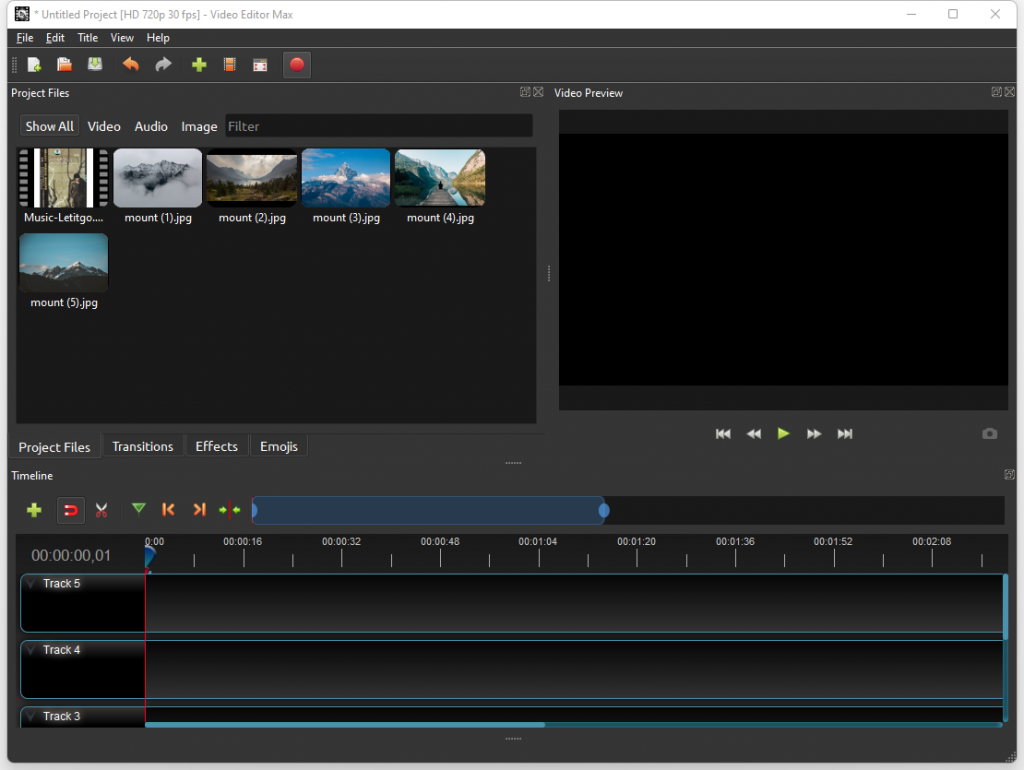
With the media files imported in, the app looks like this.

Step 2 – Arrange Photos and Videos on Timeline

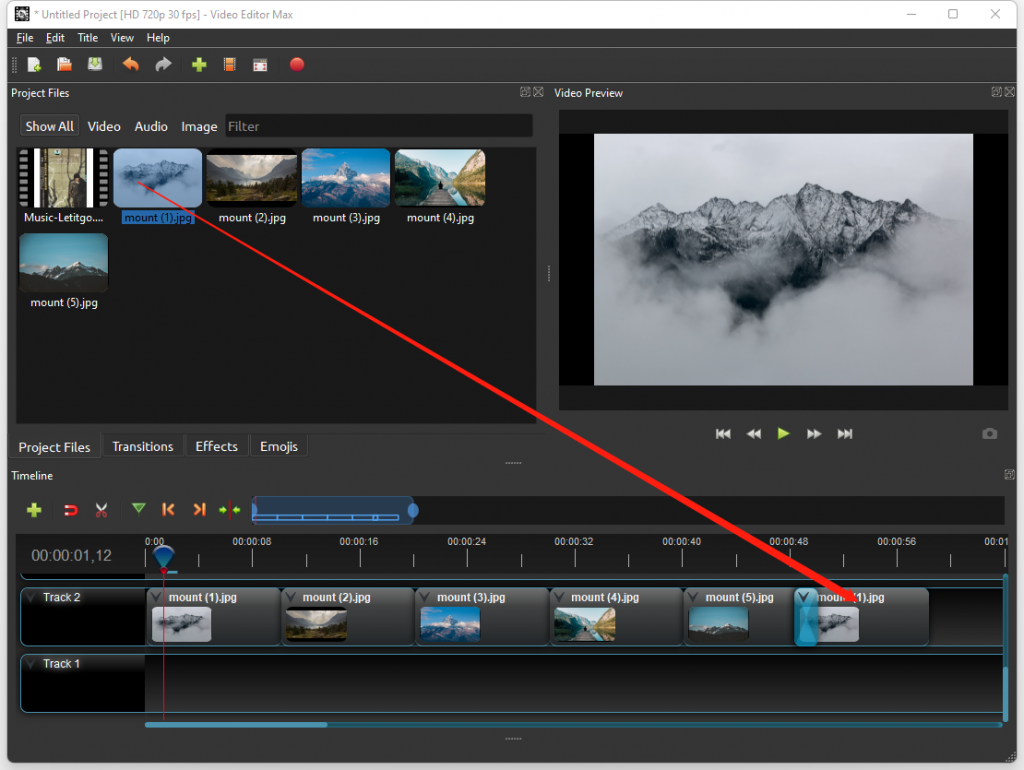
Now, drag each video or photo onto track 2 (please don’t use track 1 because in the next step we will use it to play the music) in the timeline (as seen below). The timeline represents your  final video, so arrange your photos in whatever sequence you want them to appear in your video. If you overlap two clips, Video Editor Max will automatically create a smooth fade between them (called transition), displayed by blue rounded rectangles between the clips. Remember, you can rearrange the clips as many times as needed by simply dragging and dropping them.

Sponsored Links

Screenshot:

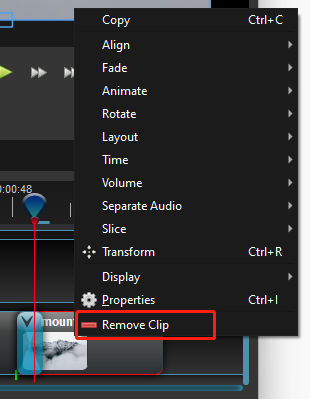
If you need to remove one clip from the timeline, simply click to select it and press the key “Del”. Or, right click the clip and select the menu “Remove Clip”.

Step 3 – Add Music to Timeline

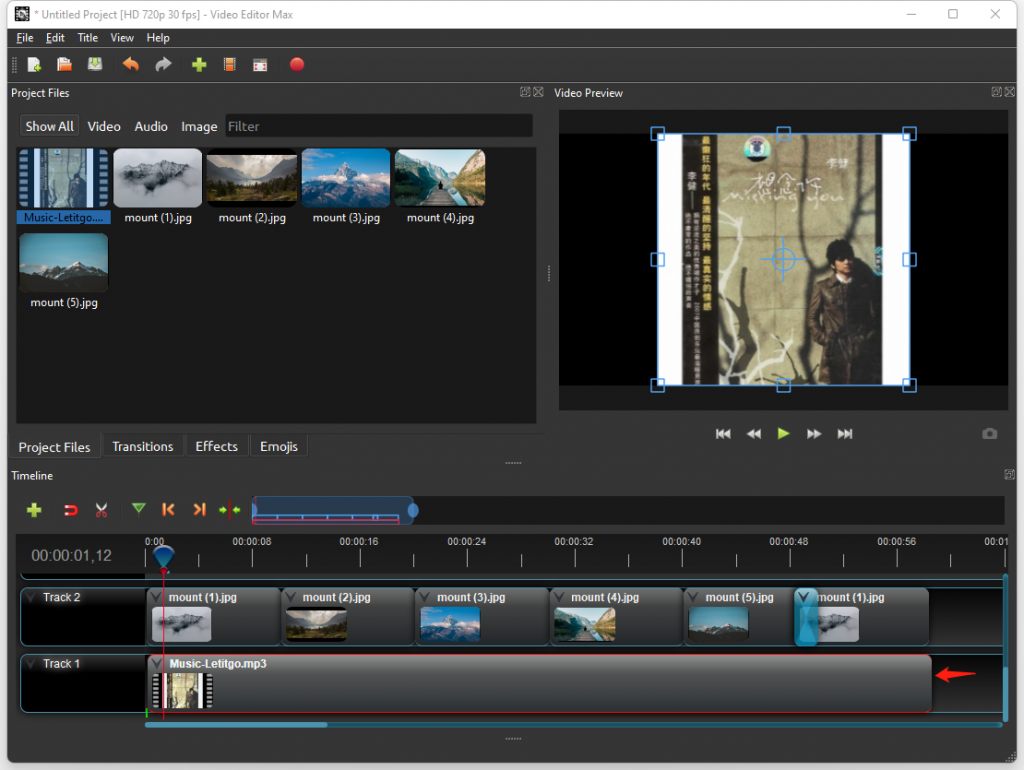
Now, we can add some background music. Click on the music file that you imported in step 1, and drag it onto track 1. 

Sponsored Links

Screenshot:

If the song is too long, grab the right edge of your music clip, and resize it smaller (that will make it end earlier). You could also insert the same file multiple times, if your music is too short. 

Step 4, Preview Your Project

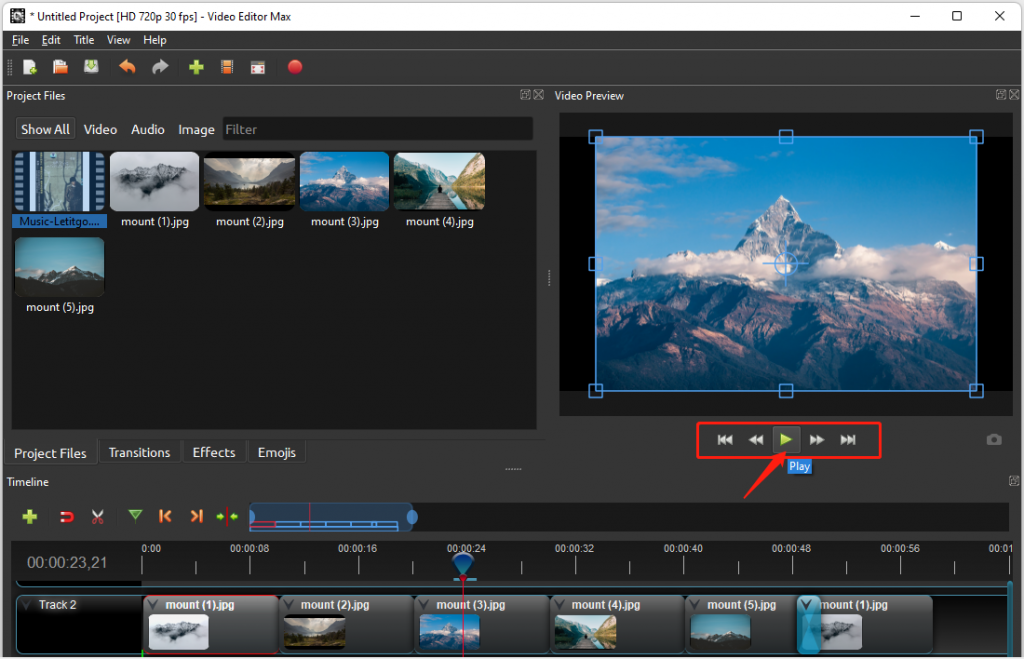
Now you can preview what our video looks & sounds like, click the Play button under the preview window. You can also pause, rewind, and fast-forward your video project by clicking the corresponding buttons.

Sponsored Links

Screenshot:

Step 5, Export Your Video

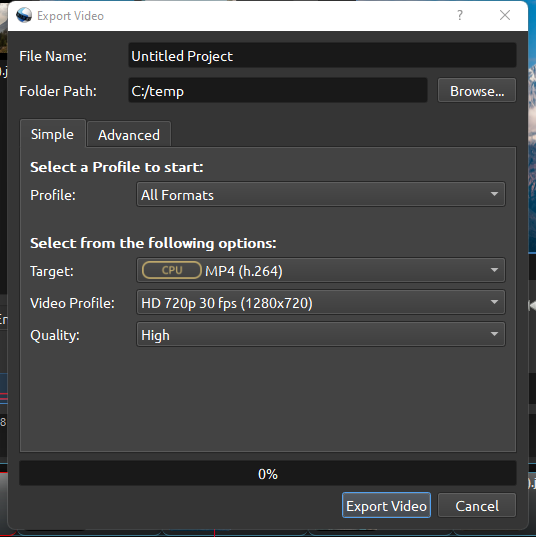
Once you are happy with your project, the final step is to export your video. This will convert your work into a single video file, which will work on most media players (such as VLC) or websites (such as YouTube, Facebook, TikTok, etc…).

There are two ways to export your video.

Method 1, click the menu “File” -> “Export Project”

Method 2, click the button “Export Video” in the toolbar

In the window, choose from one of the many preset export options, and click the Export Video button.

Now you should have your final video in the output folder you selected.

How to Add Titles and Text?

Adding text and titles is an important aspect of video editing.

Sponsored Links

In Video Editor Max, you can add a title by following these two steps. 

Step 1, create the title.

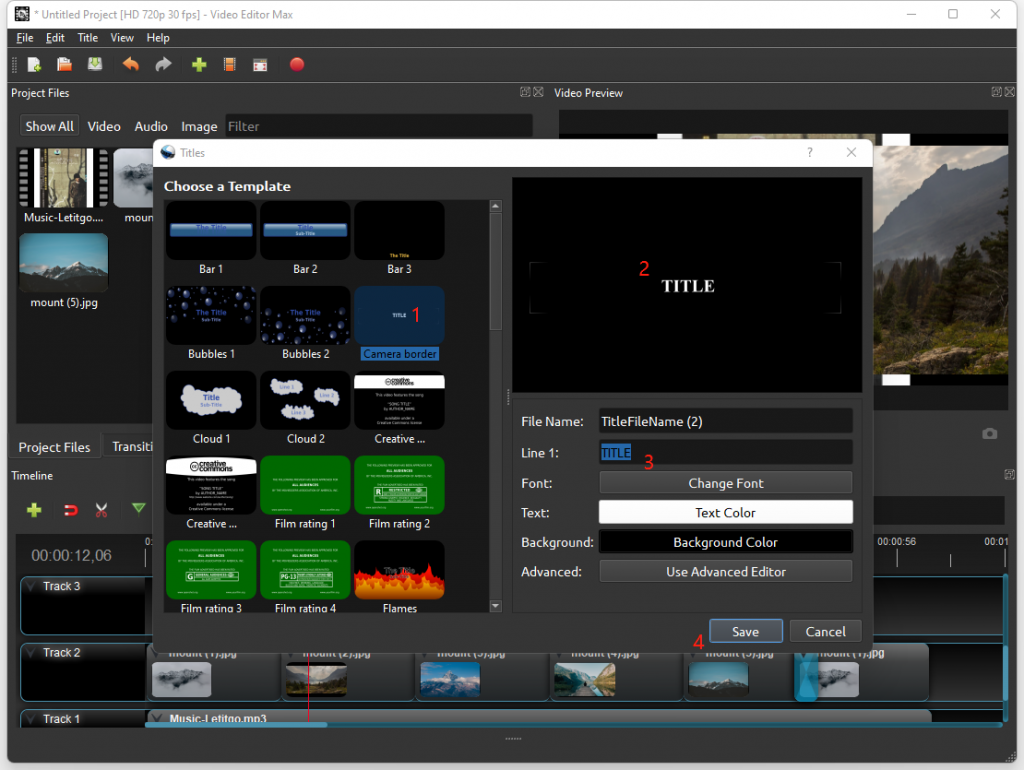
Click the menu “Title” -> “Title” to open the title editor.

In the title editor,
a, choose title template (#1).
b, preview the title (#2). 
c, change the properties including line 1, font, color, etc. (#3).
d, click the button “Save”.

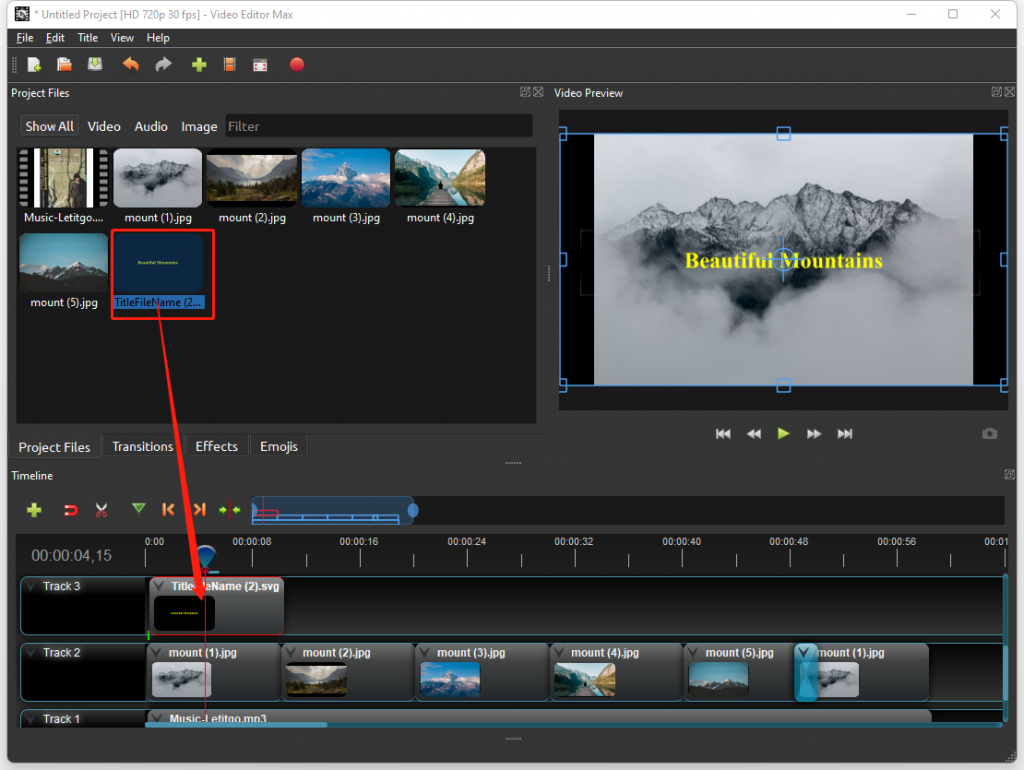
After saving, you will find the new title file appears in your project files, just like other media files you imported (as show below).

Step 2, drag the new title file on Track 3, adjust its position, preview your project and finish your video.

What to Do if I Want to Learn More Advanced Skills?

Video Editor Max is based on OpenShot project, and you are welcome to directly read OpenShot documents and learn more advanced skills

E-mail Support

If you have any further questions or feed-backs about the app or the tutorial above, please feel free to reach us by email. We are here to listen and help.