Super Video Editor Movie Maker Online Tutorial

This tutorial is for Super Video Editor Movie Maker users so that they can know and make use of the app better. 

Sponsored Links

In this online tutorial, we cover the following topics: 3-step quick-start guide for beginners, how to add transition and titles.

3-step quick-start guide for beginners

This guide will show you how to quickly make a video using your photos and short video clips.

Step 1, prepare photos, video clips and one audio file as the background music.

Step 2, add the media one by one to Super Video Editor and Movie Maker

Step 3, export the completed video.
Step 1, prepare  photos, video clips and one audio file as the background music

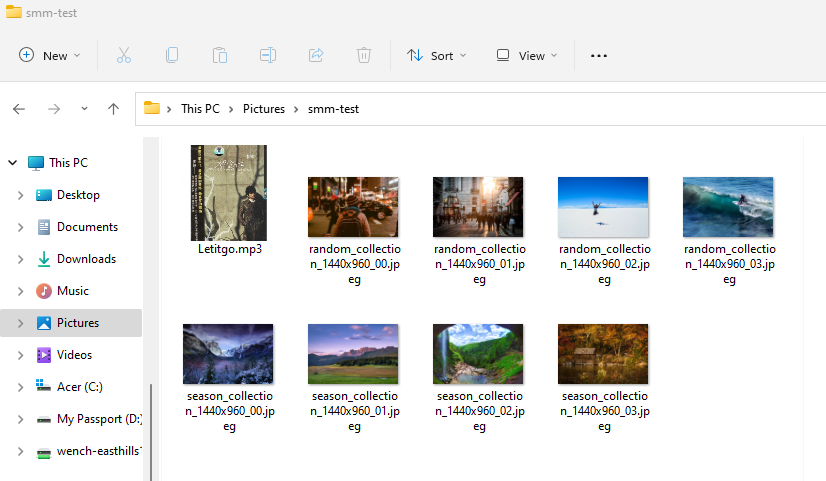
Select the photos and video clips that you want to put in the video, from your photo library, and copy them into a folder. 

Sponsored Links

For the best result, you may want to trim the photos and make sure they have similar sizes.

In addition, you need to select a mp3 file to use as the background music of the video. I suggest that you also put it into that folder.

Step 2, add the media one by one to Super Video Editor and Movie Maker

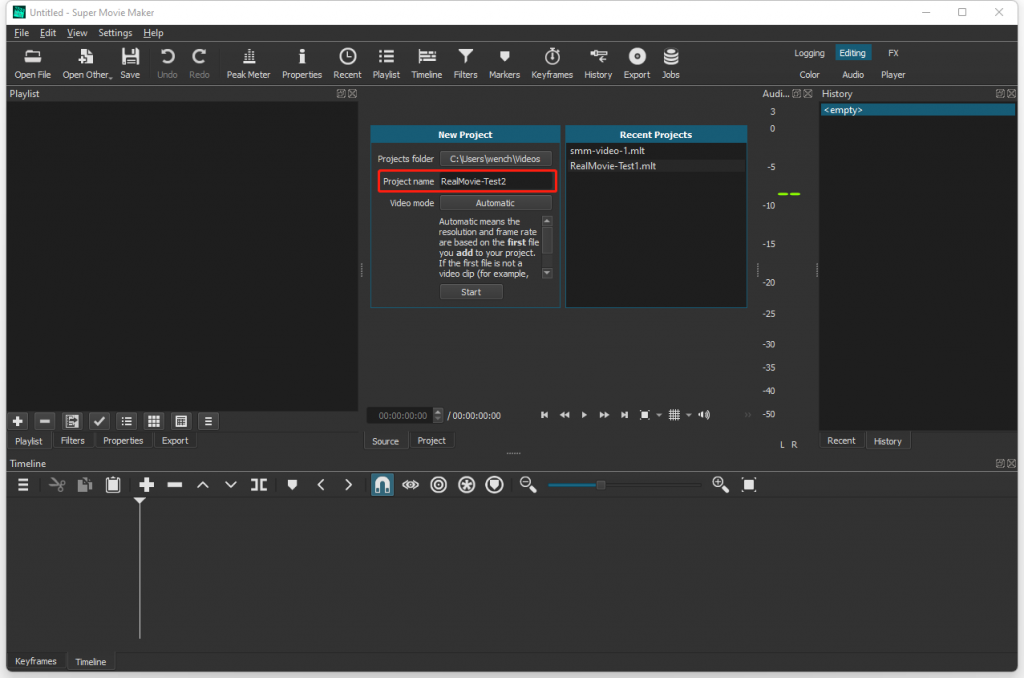
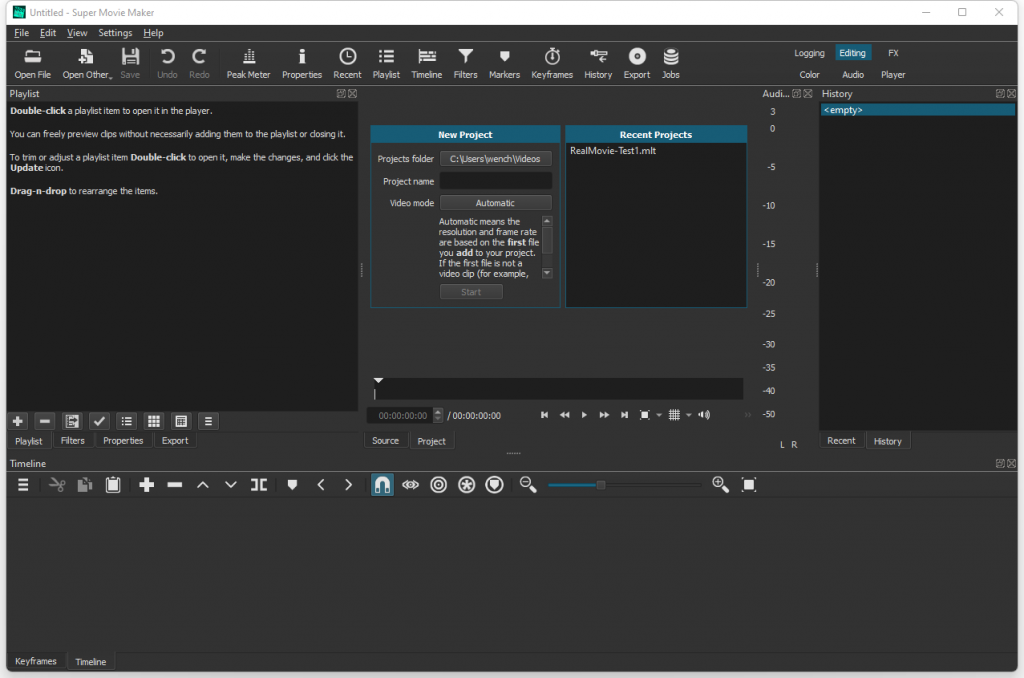
Before you can add the media to the app, you need to create a new project first. Open the app, input a project name, and click the button “Start”.

Step 2 – continued

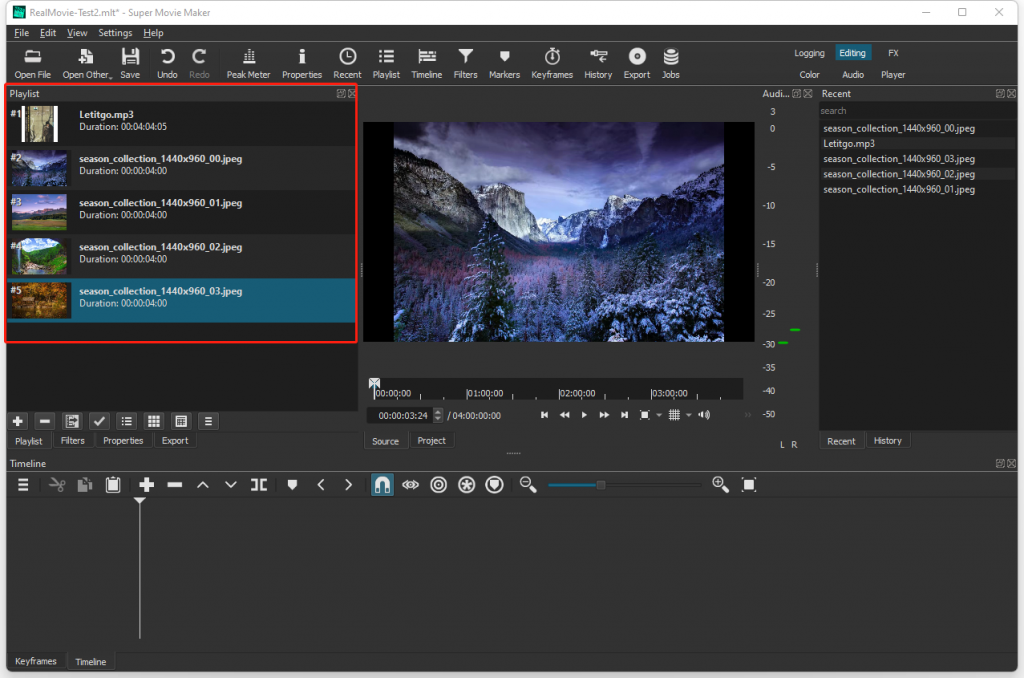
Then, add the prepared photos, video clips and audio file into the playlist. Click the menu “File” -> “Open file”, select all the photos, video clips and the audio file, and finally click the button “Open”. Now all the media should automatically added into the Playlist.

Sponsored Links

If you want to add additional files to the project, repeat this step. If the new file is not automatically added to the Playlist, you need to click the button “+” located at the bottom of the Playlist panel.

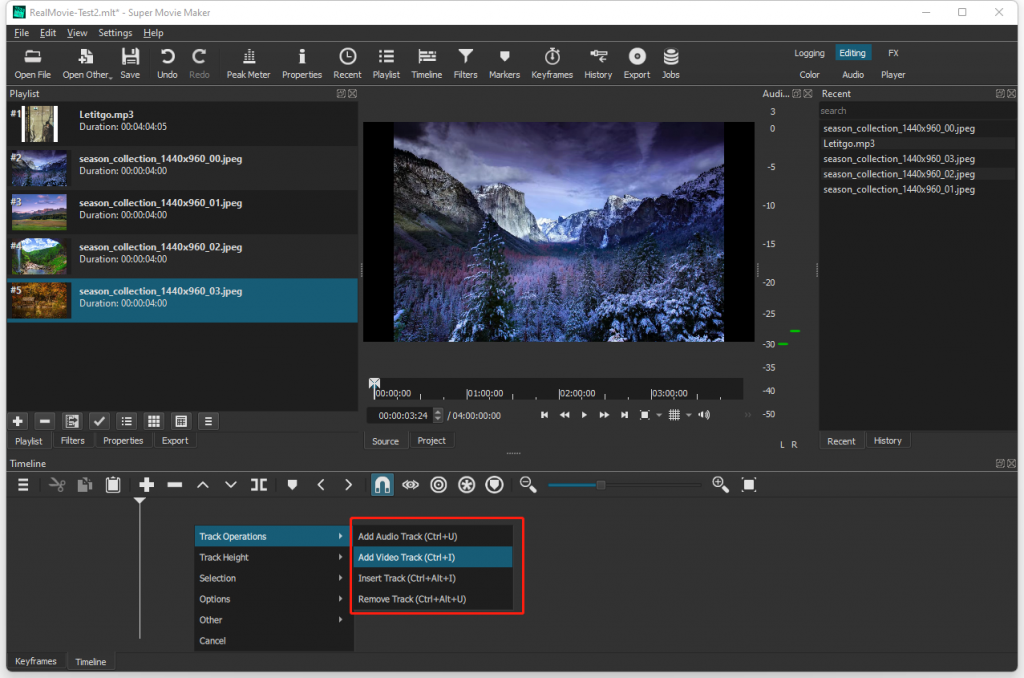
Now, let’s create one video track and one audio track. Right click you mouse at the Timeline panel (bottom part of the window), and then click “Track Operations” -> “Add Video Track” and “Add Audio Track”.

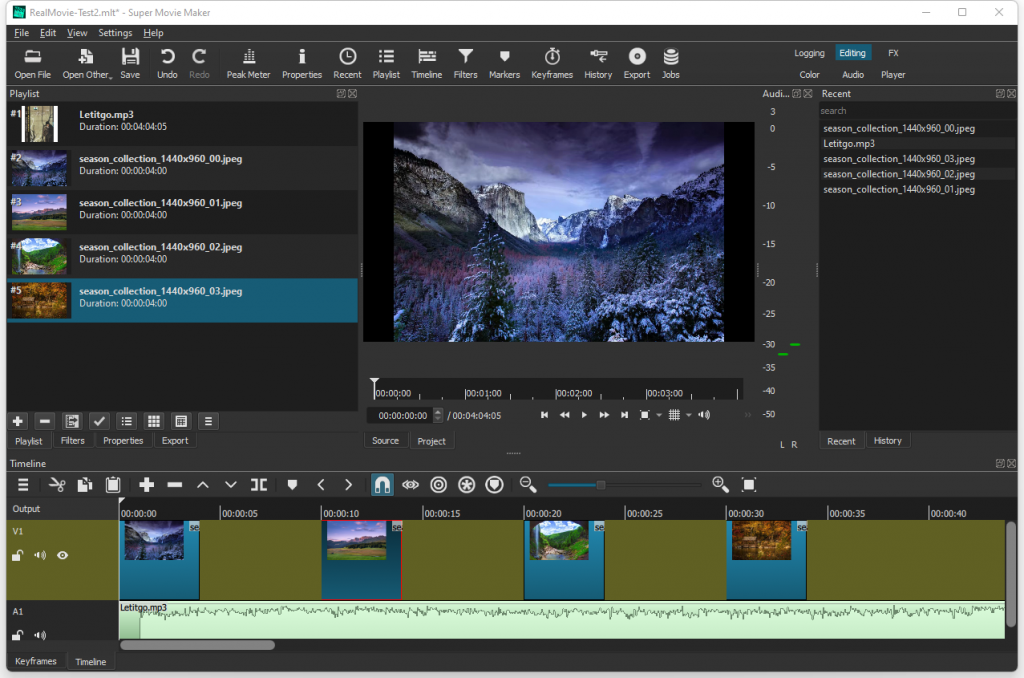
Now, drag the mp3 file from the Playlist and drop it to the audio track (A1). Drag the photo and video clips one by one, from the Playlist, and drop it to the video track (V1). When you drop the files, make sure the start position of each file is correct. You don’t want to overlap them. In the example below, I put one photo every 10 seconds.

Step 2 – continued

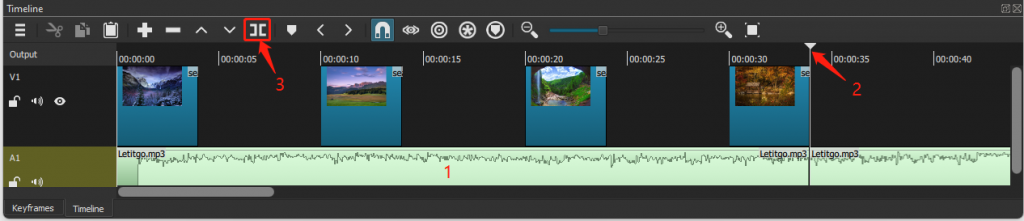
As you can see, the audio is too long for the video. We need to trim it. 1st, click to select the track A1; 2nd, click to move the Playhead to the position where you want to cut; 3rd, click the button “Split at Playhead”. Now we can use the mouse to select the right part of the track A1, and press the key “Del” on your keyboard to delete it.

Sponsored Links

Screenshot:

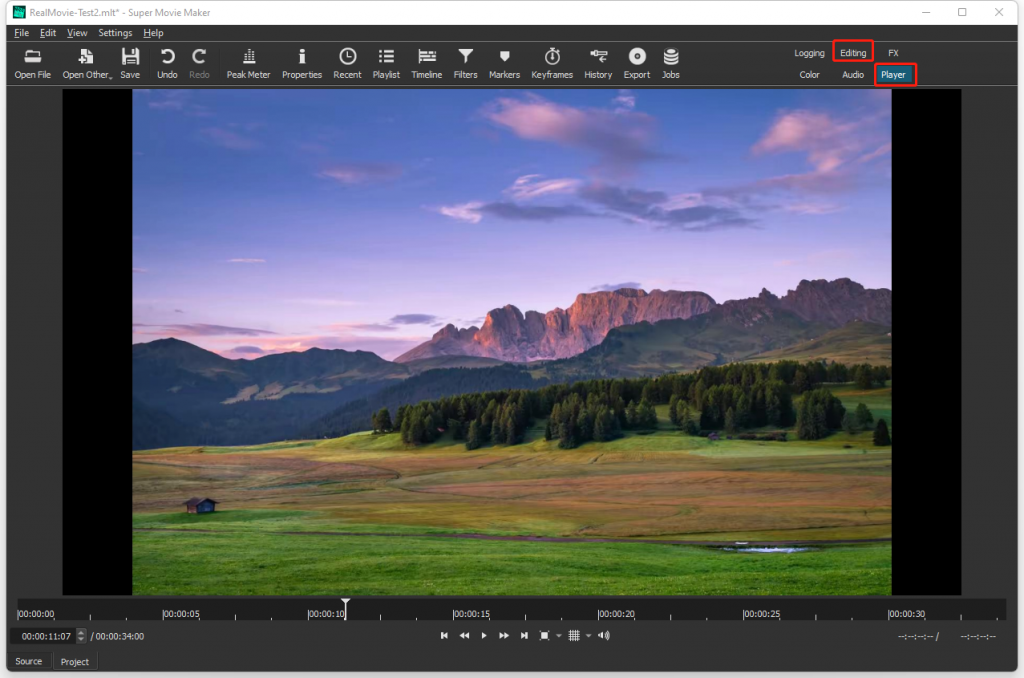
Finally, we can preview the video now. Click the button “Player” at the top right corner to preview the video. If you want to adjust the video again, just click the button “Editing”.

Step 3, Export the video

When you finish the video, in order to share it with other people or upload it to YouTube, you need to export it to mp4 or mov format.

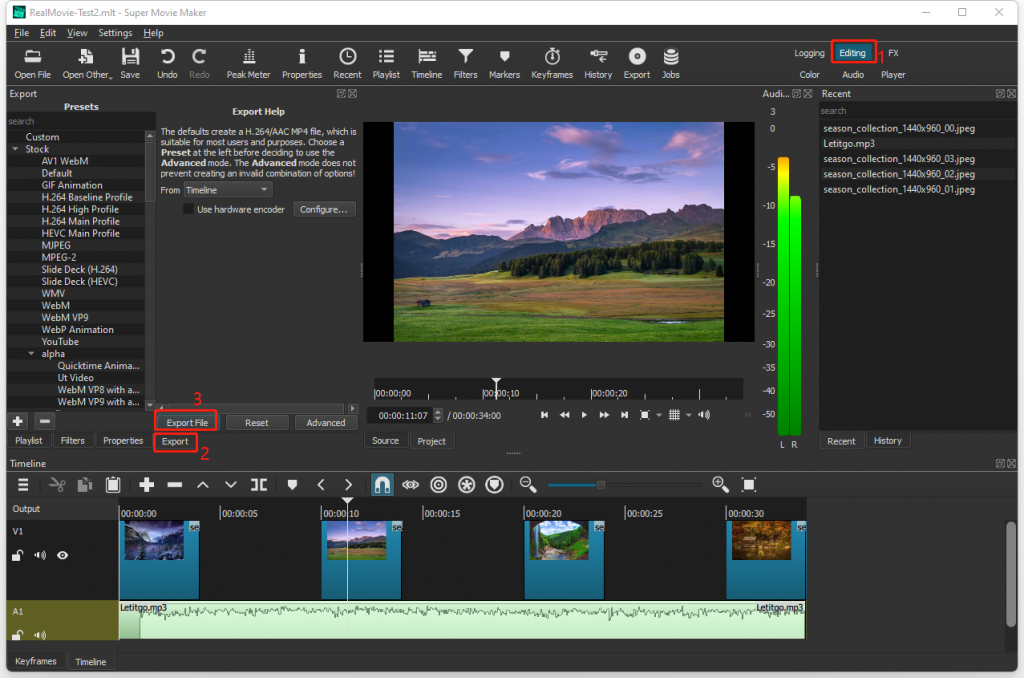
First, click the menu “File” ->”Export” -> “Video” to open the tab “Export”, then click the button “Export File”.

How to Add Transitions?

Super Video Editor Movie Maker does support video transitions.

Sponsored Links

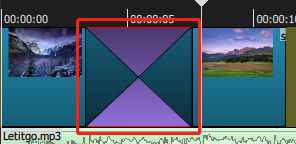
To add a transition between two media clips, drag the second clip on the timeline slightly over the
first clip and then drop it. This will create a transition, indicated by a purple symbol in between
both clips on the timeline.

To change the length of the transition, drag the right edge of the transition to make it shorter or
longer.

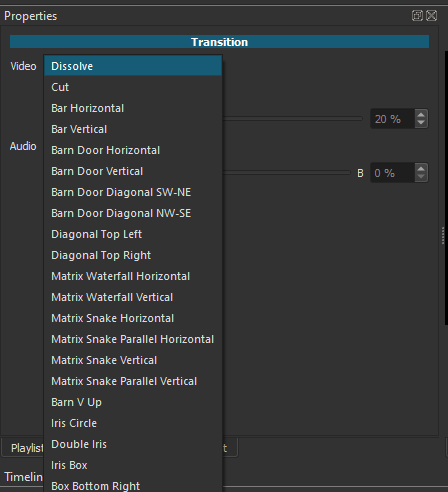
To change the type of transition, right-click the purple transition and select Properties. Choose a
new transition.

How to Add Titles and Text?

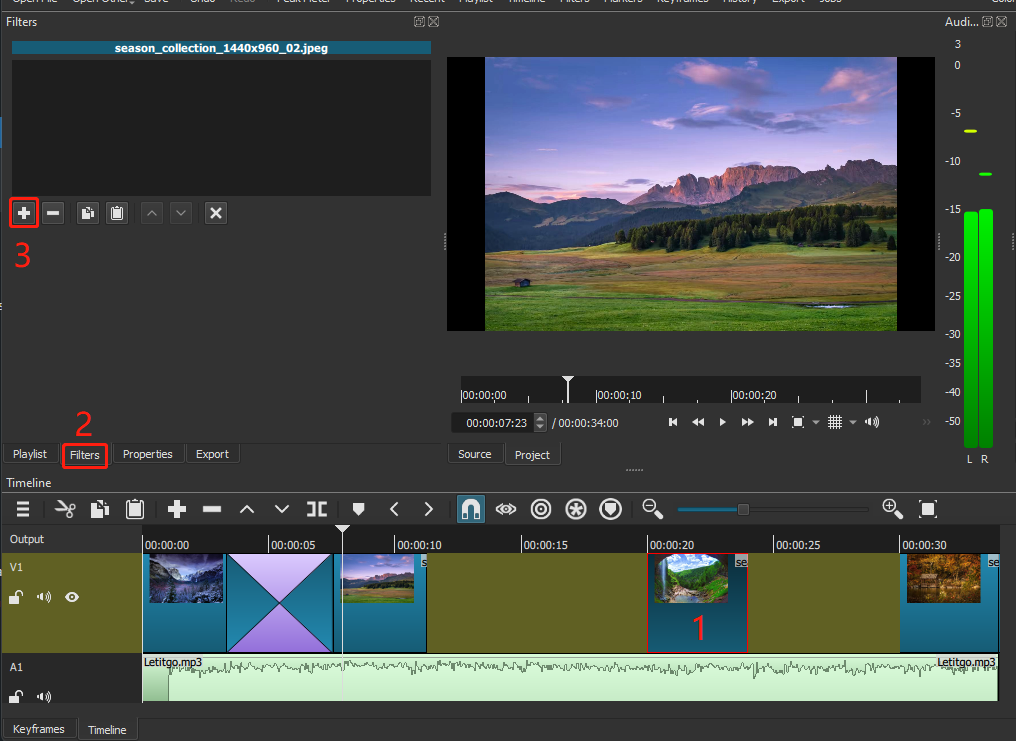
To add text over a video or photo, first select it on the timeline so it’s outlined in red. You may need to split the clips if the clip is too long for your text. (see Step 2 above). 

Sponsored Links

Select Filters in the top menu.

Click the + icon.

Select the Video icon.
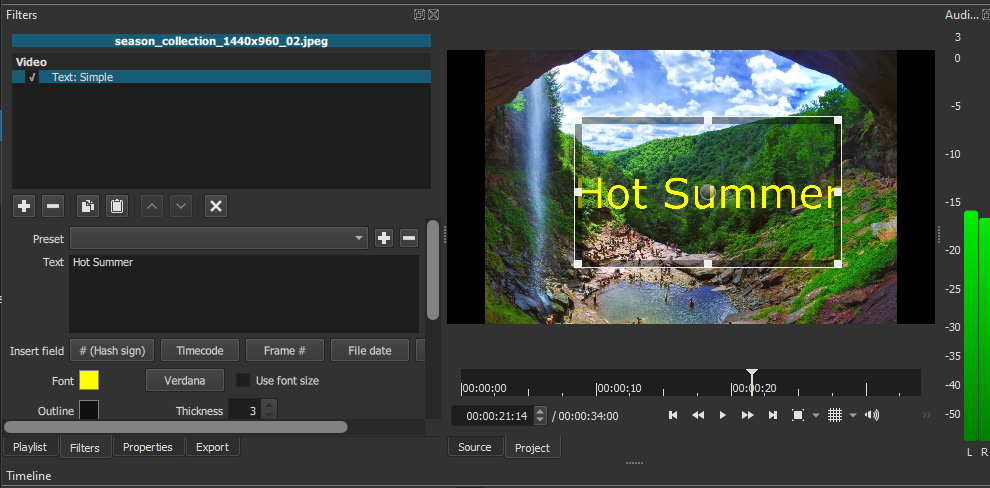
Choose Text.
Delete the timecode and add your own text. 
Change the color of the text by clicking the white box next to font and choosing a color.
Use the white boxes around the text in the preview screen to resize it and the circle in the middle of
the photo to reposition it.

E-mail Support

If you have any further questions or feed-backs about the app or the tutorial above, please feel free to reach us by email. We are here to listen and help.