Real Office Suite – Quick Start Guide

This online tutorial is a simple tutorial for Real Office Suite users. It covers the following topics: introduction, compatibility, starting new documents, opening existing documents, saving documents, password protection, closing Real Office, printing documents, and exporting to PDF.

Sponsored Links

Compatibility

Real Office Suite is totally compatible with Microsoft Office.
Real Office Suite – Introduction

Real Office Suite (a.k.a. Real Office) is a comprehensive office productivity suite for viewing and editing a wide range of office documents. Not only can it support Microsoft Office file formats like Word, Excel, and PowerPoint but also OpenOffice document files, an open standard format that is being adopted by governments worldwide as a required file format for publishing and accepting documents. Plus, it also offers a vector graphics and flowcharts drawing program, a databases editor, and a Math formula editing application.

Real Office includes six components: Word, Spreadsheet, Slideshow, Draw, Math and Base.
Starting New Documents

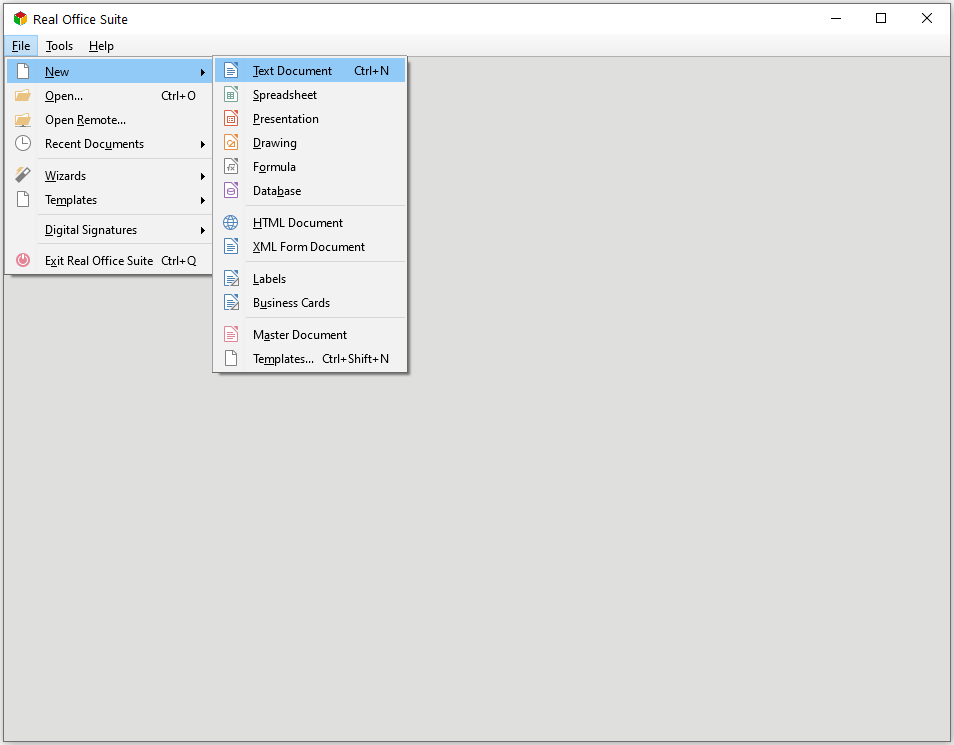
You can start a new, blank document in Real Office in several ways. When Real Office is running but no document is open, the Start Center is shown. Click one of the icons to open a new document of that type, or click the Templates icon to start a new document using a template.

Sponsored Links

You can also start a new document in one of the following ways:

  • Use File > New on the Menu bar and select the type of document from the context menu.
  • Use the keyboard shortcut Ctrl+N to create a new document. The type of document created depends on which Real Office component is open and active. For example, if Calc is open and active, a new spreadsheet is created.
  • Use File > Wizards on the Menu bar and select the type of document from the context menu.
  • If a document is already open in Real Office, click the New icon on the Standard toolbar and a new document of the same type is created in a new window. For example, if Math is open and active, a new spreadsheet is created. The New icon changes depending on which component of Real Office is open.
  • If a document is already open in Real Office, click on the small triangle to the right of the New icon on the Standard toolbar and select the type of document from the context menu that opens.

Opening Existing Documents

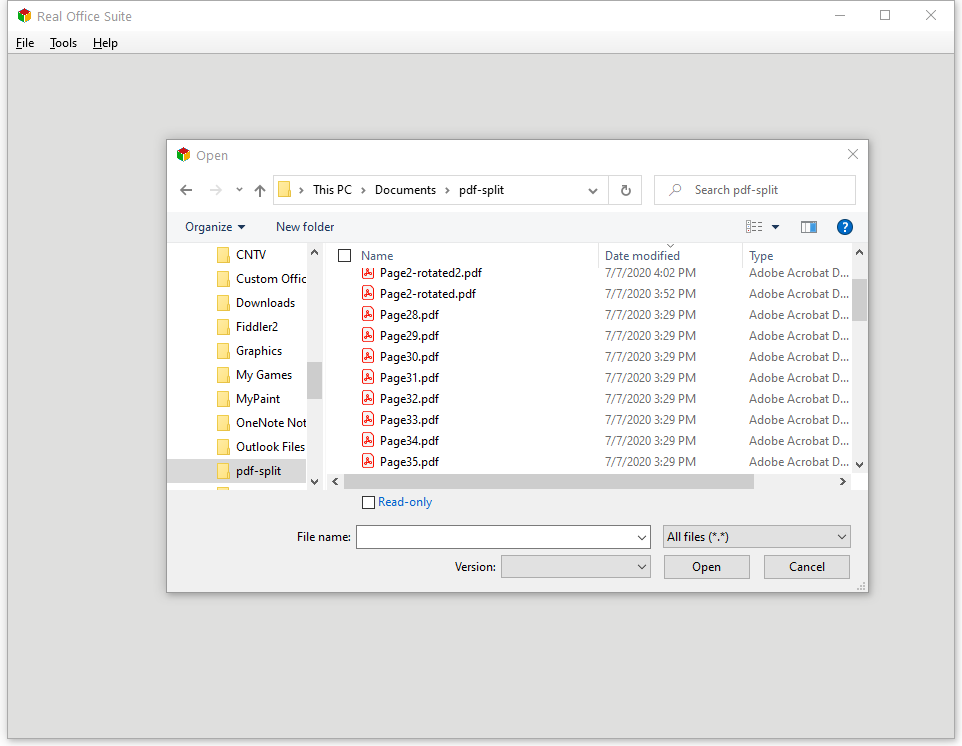
You can start Real Office by double-clicking the filename of an ODF document on the desktop, or in Windows Explorer. The appropriate component of Real Office will start and the document will be loaded.

Sponsored Links

If you do not have Microsoft Office installed on your computer, or if Microsoft Office is installed but you have associated Microsoft Office file types with Real Office, then when you double-click on the following files, they open in Real Office:

  • A Word file (*.doc or *.docx) opens in Word.
  • An Excel file (*.xls or *.xlsx) opens in Spreadsheet.
  • A PowerPoint file (*.ppt or *.pptx) opens in Slideshow.

If you did not associate the file types and Microsoft Office is installed on your computer, then when you double-click on a Microsoft Office file, it opens using the appropriate Microsoft Office component.

Saving Documents

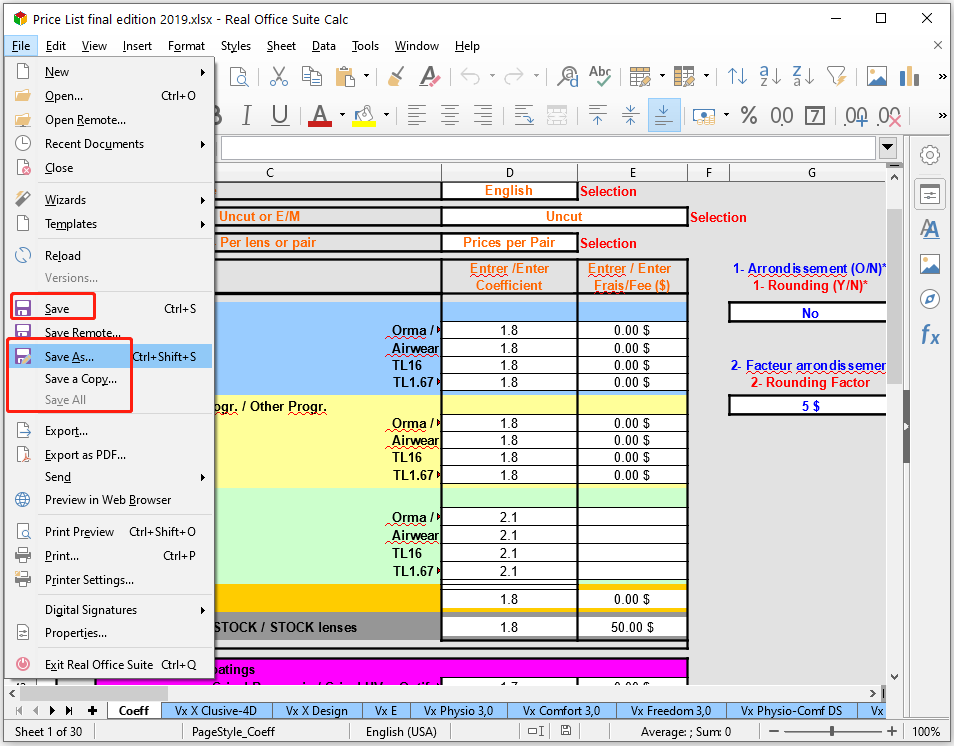
You can save documents as follows:

Sponsored Links
  • Save command – use if you are keeping the document, its current filename and location.
  • Save As – use if you want to create a new document, or change the filename and/or file format, or save the file in a different location on your computer.
  • Save a copy – use if you want to save a copy of your current document and keep it open for more editing.
  • Save All – use to save all the files open in your current session.

Saving documents automatically

Real Office can save files automatically as part of the AutoRecovery feature. Automatic saving, like manual saving, overwrites the last saved state of the file.

To set up automatic file saving:

  1. Go to Tools > Options > Load/Save > General on the Menu bar.
  2. Select Save AutoRecovery information every and set the time interval.
  3. Click OK.

Password Protection

To restrict who can open and read a document, or open and edit the document, use password protection.

Sponsored Links
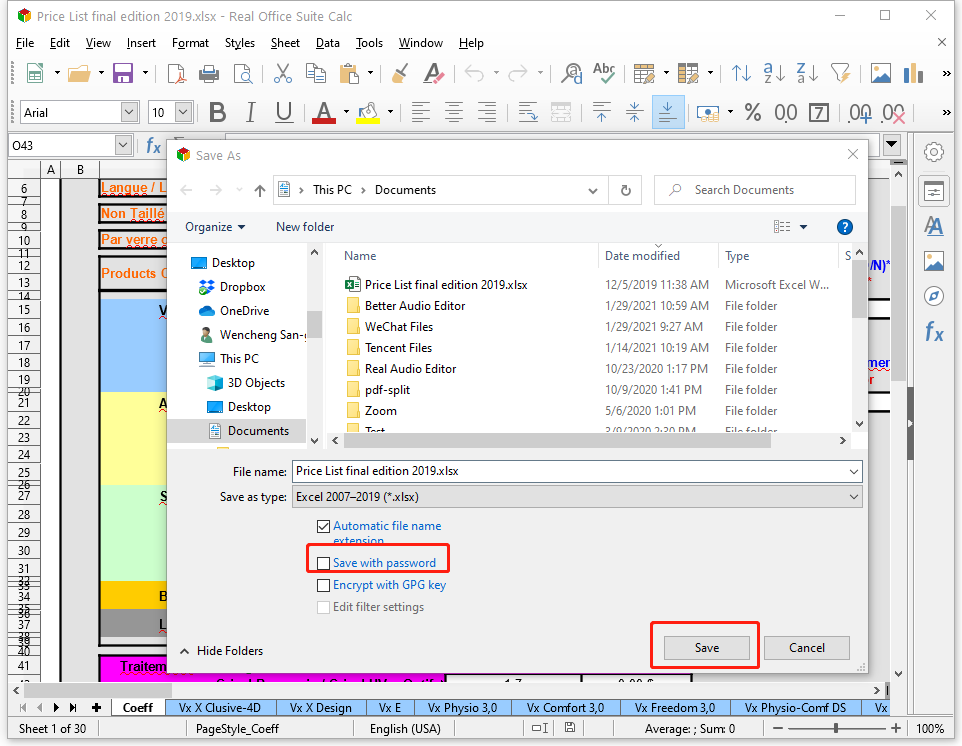
  1. Using the Save As command command above, select the Save with password option in the Save As dialog or Save dialog.
  2. Click Save and the Set Password dialog opens.
  3. In File Encryption Password, enter a password to open the document and then enter the same password as confirmation.
  4. To restrict who can edit the document, click Options.
  5. In File Sharing Password, select Open file read-only, enter a password to allow editing, and then enter the same password as confirmation.
  6. Click OK and the dialog closes. If the passwords match, the document is saved password-protected. If the passwords do not match, you receive an error message.

Closing Real Office

To close Real Office completely, go to File > Exit on the Menu bar in Windows and Linux operating systems. When you close the last document using the X on the title bar of the window, then Real Office will close completely.

You can also use a keyboard shortcut– Ctrl+Q

If any documents have not been saved since the last change, a message box is displayed. Choose whether to save or discard your changes.

Printing Documents

For quick printing, click the Print File Directly icon (the printer icon) to send the entire document to the default printer defined for your computer.

Sponsored Links

For more control over printing, use the Print dialog (File > Print or Ctrl+P).

The Print dialog has four pages, from which you can choose a range of options. The different components of Real Office have different print settings available.

Exporting to PDF

Real Office can export documents to PDF (Portable Document Format). This industry-standard file format is ideal for sending the file to someone else to view using Adobe Reader or other PDF viewers.

Click the Export Directly as PDF icon (file format icon with a red PDF tag) to export the entire document using the PDF settings you most recently selected on the PDF Options dialog. You are asked to enter the file name and location for the PDF file, but you do not get a chance to choose a page range, the image compression, or other options.

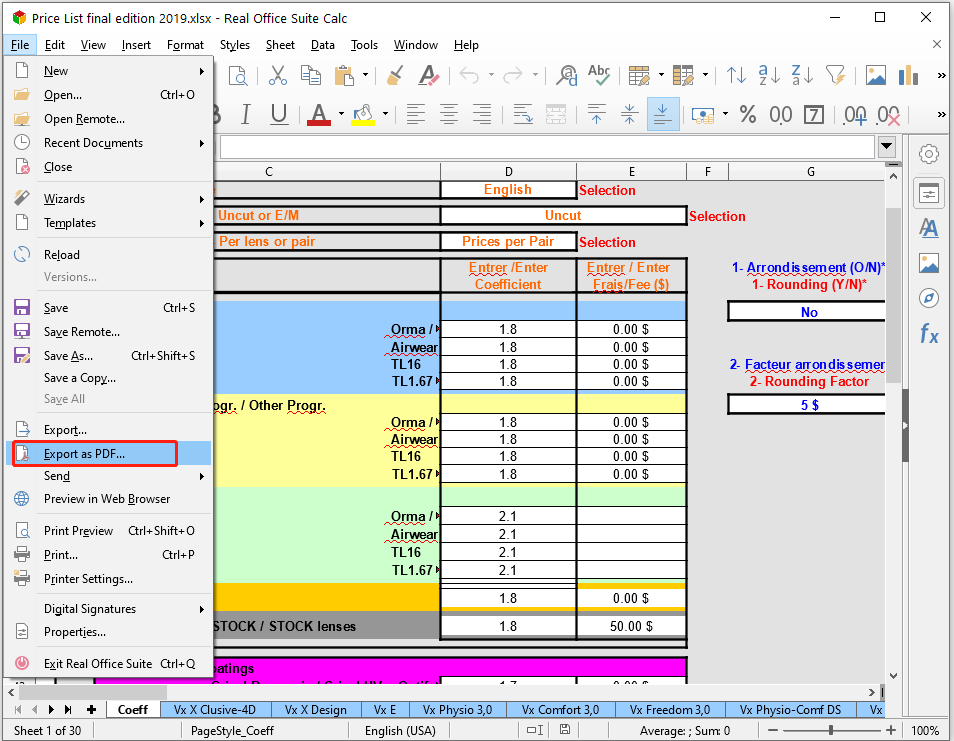
For more control over the content and quality of the resulting PDF, use File > Export as PDF. The PDF Options dialog opens. This dialog has six pages (General, Initial View, User Interface, Links, Security, and Digital Signatures). Select the appropriate settings, and then click Export. Then you are asked to enter the location and file name of the PDF to be created, and click Save to export the file.

E-mail Support

If you have any further questions or feed-backs about the app, please feel free to reach us by email. We are here to listen and help.

Sponsored Links
Xiaoya Lab